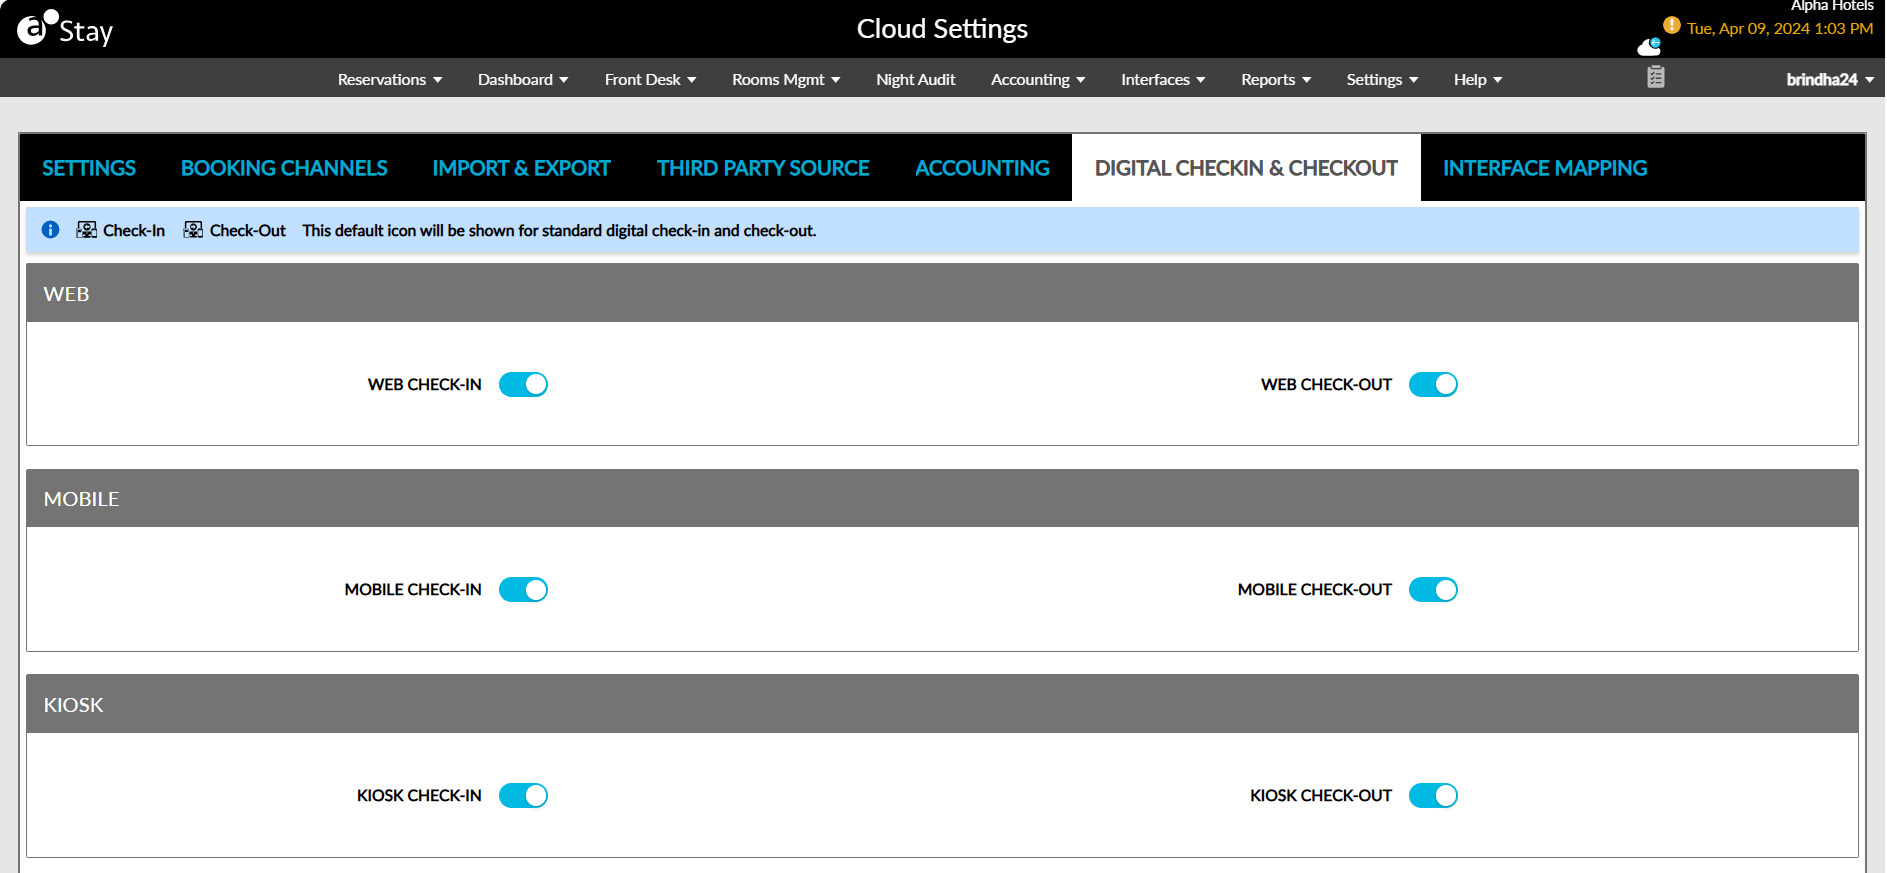
Digital Check-In & Out
Users can select the following check-in and check-out methods for the property:
|
Method |
Options |
|---|---|
|
Web |
|
|
Mobile |
|
|
Kiosk |
|
Users can select multiple check-in and check-out methods.
Configuring Automated Digital Check-In Settings
When the feature setting is enabled, users can configure the values of the preferred fields in the Automated Digital Check-In section in the Digital Check-In & Out tab. This section displays the following message: Automated digital check-in batch process will run every 15 minutes. The Automated Digital Check-In section is not displayed when the Automated Digital Check-In feature setting is disabled.
Users can configure the start and end time for automated digital check-in by enabling the Enable digital check-in time settings checkbox in the Automated Digital Check-In section. This checkbox is disabled by default. Only users with the Stay_WriteAutoDigitalCheckinTime permission can enable this checkbox. When disabled, the guest can perform digital check-in at any time. For example, if the automated digital check-in time is configured from 10AM to 5PM, and the property wants to allow digital check-in without a time limit, this checkbox must be unchecked.
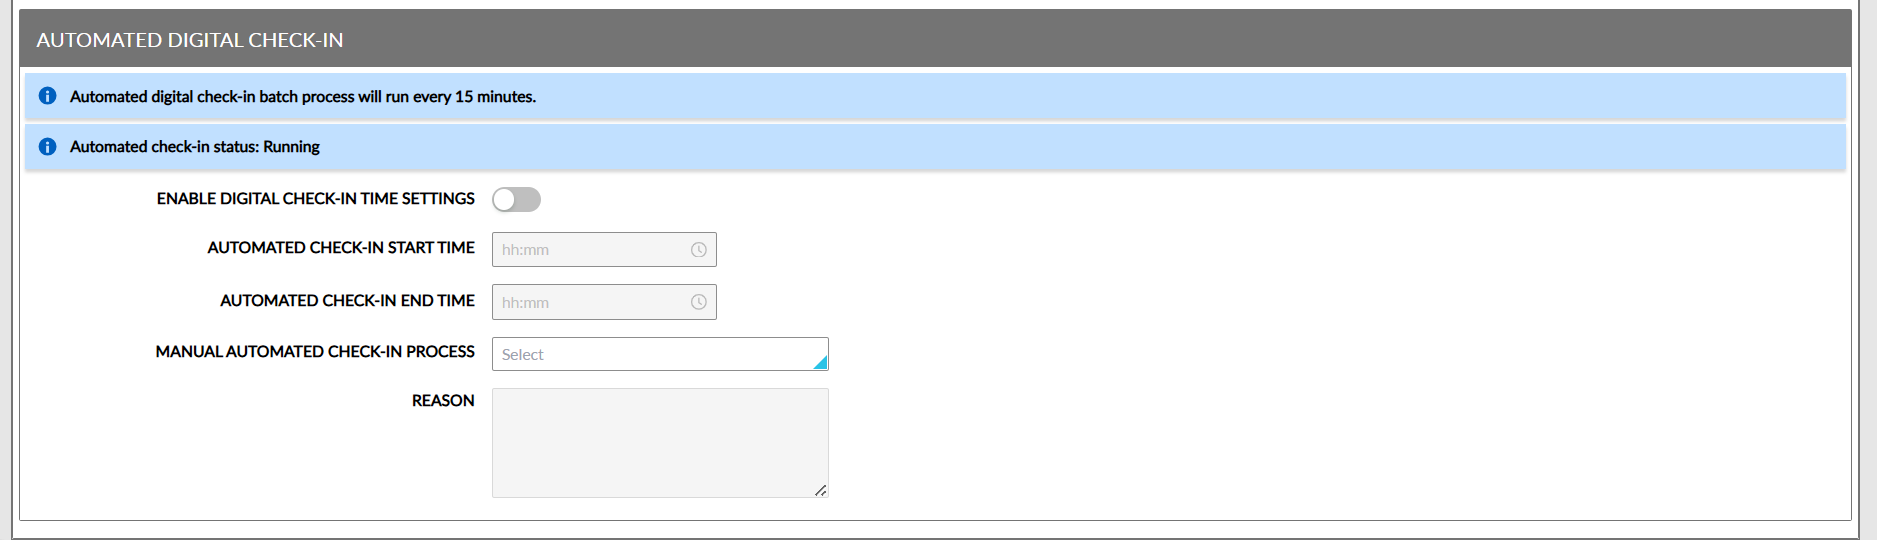
When this checkbox is enabled, users can configure the start time and end time for the automated digital check-in process in the Automated Check-In Start Time and Automated Check-In End Time fields. Based on the time selected, the digital check-in process is performed. When the guest tries to perform digital check-in within the configured time frame, the reservation is checked in if the mentioned criteria are met. Only users with the Stay_WriteAutoDigitalCheckinTime permission assigned can update the configured time.
Users can manually start/stop/disable the automated check-in process by selecting the following options in the Manual Automated Check-In Process drop-down list:
|
Option |
Description |
|---|---|
|
Start |
|
|
Stop |
|
|
Disable |
|
When the automated check-in process is stopped manually and users try to configure the start and end time without changing the value of the Manual Automated Check-In Process field, the following message is displayed: Automated check-in: Stopped. The automated check-in time will start as per the configured start time.
When the automated check-in process is disabled manually and users try to configure the start and end time without changing the value of the Manual Automated Check-In Process field, the following message is displayed: Automated check-in: Disabled: The automated check-in time will start the next business day as per the configured start and end time.
When the automated check-in process is started manually and users try to configure the start and end time without changing the value of the Manual Automated Check-In Process field, the following message is displayed: Automated check-in: Started: The automated check-in time will continue until the configured end time and the new check-in time will start the next business day.
Users can enter the reason for starting/stopping/disabling the automated digital check-in process in the Reason field. A maximum of 250 characters can be entered. When users update the values of the preferred fields and click Save, the changes are updated for users with the appropriate permission. For users without permission, the Authorize Action pop-up screen appears that prompts users to enter their credentials to validate if the user has the required permissions to update the fields.
-
If the user has the required permissions, the updates are saved successfully.
-
If the user does not have the required permission, the following message is displayed: User does not have the appropriate permissions/credentials to complete this task.