Property Configuration
Add the General Area to a Building
It configuration setting allows a user to create a general area to identify areas of the property outside of an actual room that requires service. For example, a lobby or pool area. It is useful when building a foundation for maintenance service requests.
Perform the following steps to add a general area to the building:
Navigate to the Property Configuration tab.
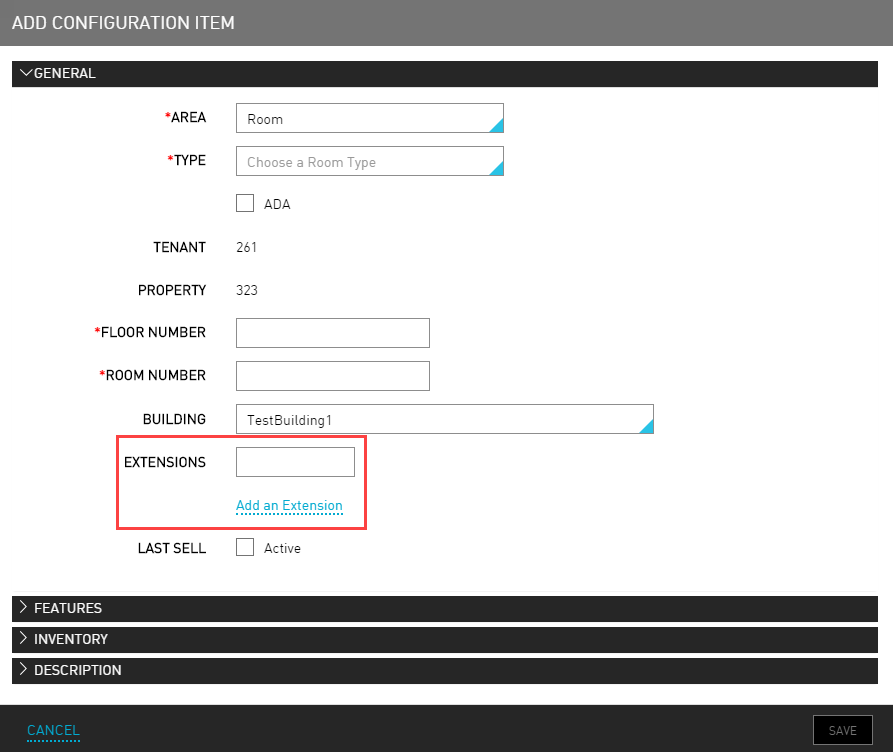
Click Add. The Add Configuration Item dialog box appears.
Refer to the following table and fill in the fields to add general area to the building in the General tab:
|
Field |
Description |
|---|---|
|
Area |
The area located within the property. |
|
Type |
The type of general area that the area is located within. |
|
ADA |
Indicates if this area is ADA-compliant to help during the maintenance process. |
|
Tenant |
The tenant ID associated with the building. |
|
Property |
The property ID associated with the building. |
|
Floor Number |
The floor number that the area is located. |
|
Room Number |
The room number that the area is located. |
|
Building |
The building where the area is located. |
|
Extensions |
The number of phone extensions in the specified area. |
|
Last Sell |
The room will only be assigned if there are no other rooms available for a particular room type. |
Select Add an Extension link to add an extension.
Navigate to the Features tab in the Add Configuration Item page.
Refer to the following table and fill in the fields to add a new feature:
|
Field |
Description |
|---|---|
|
Name |
The name of the feature. |
|
Code |
A unique code to identify the feature. |
|
Category |
The appropriate category for the feature. For example, a sauna feature may belong to a spa category. |
Click Add a new category from the Category drop-down list if the category the user wants does not exist.
Navigate to the Inventory tab in the Add Configuration Item page.
Select the effective and deactivate calendar dates for the area.
Navigate to the Description tab in the Add Configuration Item page.
Enter the description for the area.
Click Save. The general area details are added to the building successfully.
Add a Suite Room
Once the suite room types have been for the property, the property must set up the specific virtual rooms in two steps:
-
Set up general room information
-
Configure Component Rooms
Set up General Room Information
Add the details for each Virtual room on the property, including the room number and location.
Navigate to Settings > All Settings > Rooms & room types (under General).
Click Property Configuration.
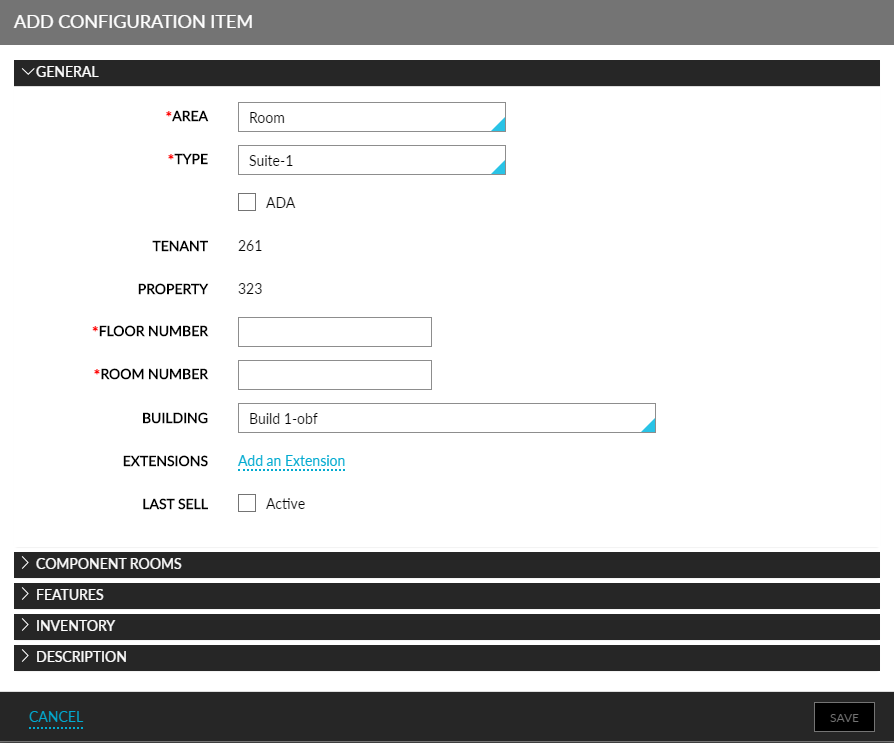
Click Add to open the Add Configuration Item dialog box.
Select Room as the Area in the General section.
Select the suite room type from the Type drop-down. From the example, select Suite-1.
Enter the Floor Number where this room is located.
Enter the Room Number of the Virtual room. The room number must be unique within the building.
The Type cannot be changed after creating the room.
Select where this room is located from the Building list if the property has more than one building.
Click Add an extension and then type the extension number. If Agilysys Stay is connected to the phone system, this extension must match the phone system's extension.
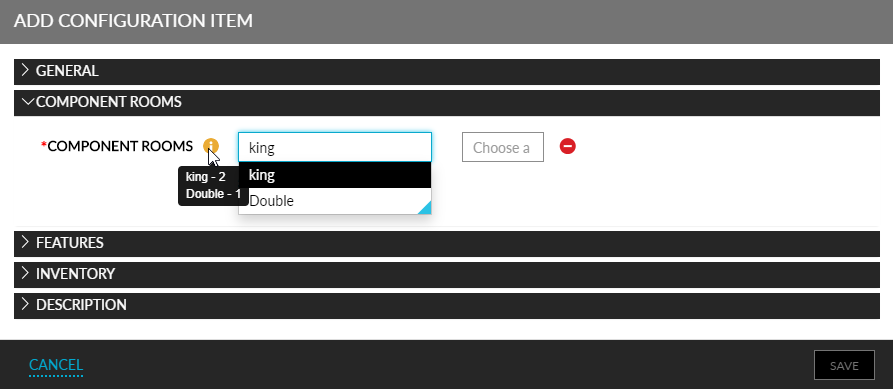
Configure Component Rooms
Configure the details of the component rooms of a virtual room on the property.
Click the Component Rooms section.
Choose a Room Type.
Select an available room number for the room type.
Click the Add Definitions link to configure all the other component rooms for the Virtual room.
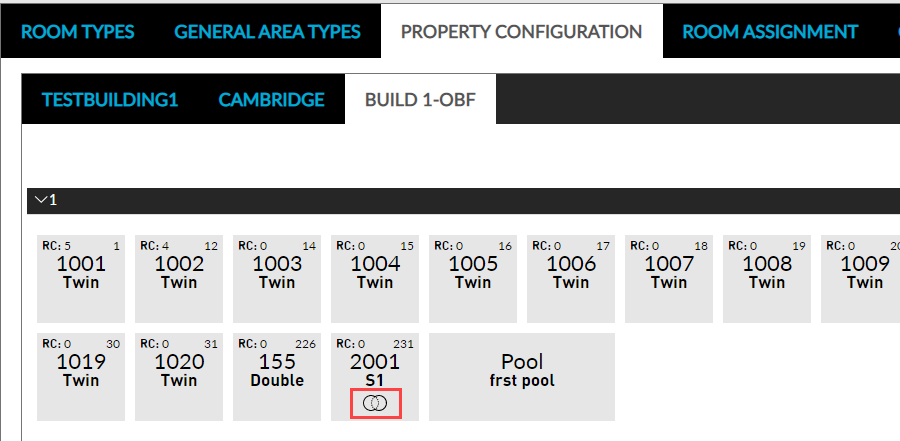
Click Save to complete the configuration of the virtual room.
Once a virtual room is configured for a property, they are available for selection while booking a reservation. The virtual rooms are indicated with an icon on the Property Configuration page.
Marking Rooms as Connected or Nearby
Users can mark rooms as Connected or Nearby from the Property Configuration tab using the Connect and Nearby options displayed under More. When users select rooms and mark them as connected, the room number of the connected room is displayed in the room number tile.
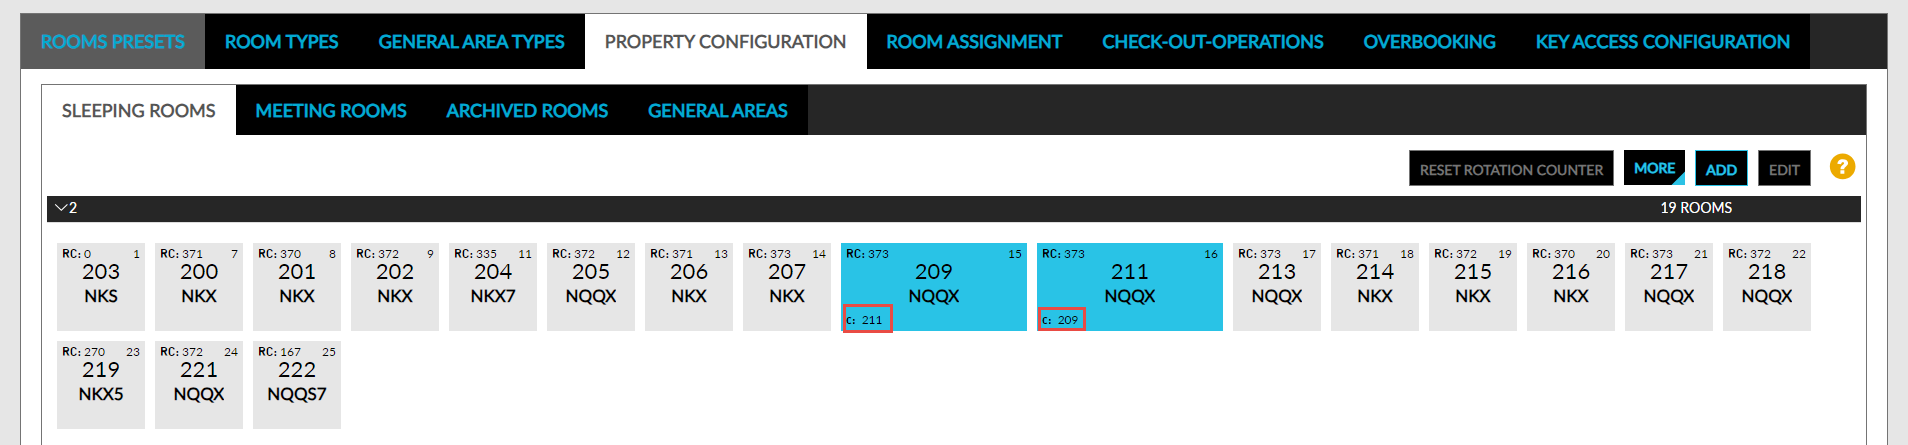
When users select rooms and mark them as nearby, the room number of the rooms that are in proximity are displayed in the room number tile.

Rooms cannot be marked as connected and nearby at the same time.