Set Up Pantry Items
Before adding pantry items to reservations, these items themselves must be set up for usage in Agilysys Stay. Once the items are set up, the Guest Service Agent (GSA) can directly add items from the pantry items’ shopping cart to reservations.
Perform the following steps to set up the pantry:
Navigate to Settings ➜ All Settings ➜ Accounting ➜ Pantry Management. The Pantry Setup page is displayed.
Click Add to add new items to the pantry module. The Add Pantry Item page appears.
Refer to the following table and fill in the fields to set up pantry items:
|
Field |
Description |
|---|---|
|
Active |
Enable the checkbox to activate the pantry items. |
|
Name |
The name of the pantry item. |
|
Code |
A unique code to identify the pantry item. |
|
Transaction Item |
The transaction item from the drop-down list. |
|
Price |
The price for the pantry item. For some items, the price is also auto-populated. |
|
PLU |
The product look-up number associated with the pantry item. |
|
Require Inventory Tracking |
|
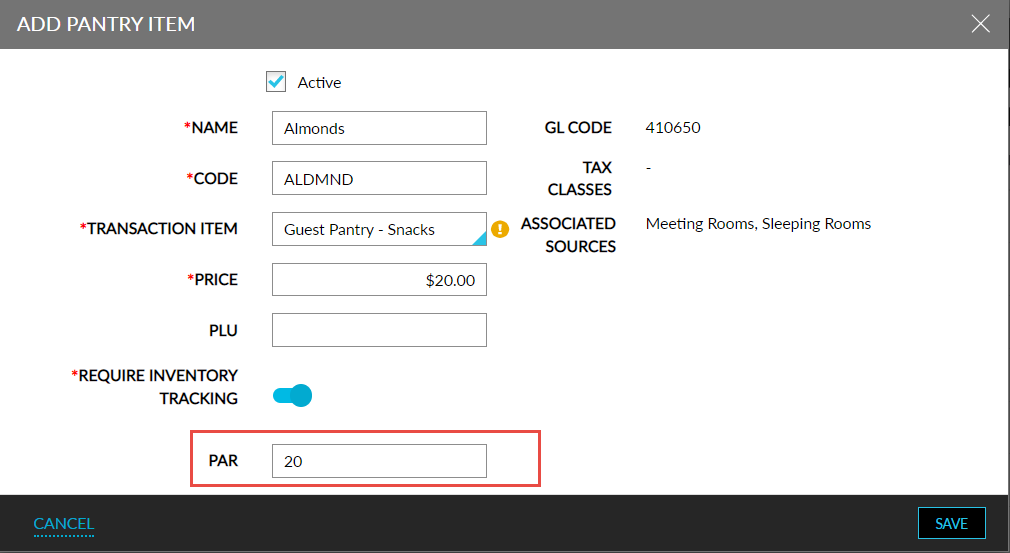
Select an item from the Transaction Item drop-down list. The GL Code, Tax Classes, and Associated Sources are auto-populated to the pantry item, depending on the transaction item selected.
Click Save. The pantry item is now successfully added to the pantry module.