Report Enhancements: Ability to Group Custom Reports and Handle Timeouts During Downloads
Stay is enhanced to allow users to group multiple custom reports (Dynamic) into a single grouped report. Previously, users were limited to generate each report individually. Now, with this feature, users can add multiple reports into a single group which can be printed, downloaded, and emailed at one go.
Permissions
The following new permission is introduced to enable users to group custom reports (dynamic):
-
Stay_AddEditGroupedReports - allows users to create or modify grouped reports.
-
The permission is assigned to the following default roles:
-
System Administrator
-
Stay Hotel Manager
-
Department Manager
-
Stay Hotel Supervisor
-
GSA Supervisor
-
Housekeeping (HK) Supervisor
-
Accounts Receivable Manager
-
Saved Reports
The Saved Reports tab displays the reports saved as user favorites. Here, users can view the list of reports saved as user favorites. The following columns are displayed in the Saved Reports tab:
|
|
|---|---|
|
|
|
|
|
|
|
|
Running Saved Reports
Users can run the saved reports using the Run button. When clicked, the Run pop-up screen appears that allows users to select the format (CSV or PDF) in which the report must be generated and the email address to which the reports generated in PDF format must be emailed. Users must click Confirm to initiate the report generation.
Once the user clicks Confirm, the system starts to generate the report and the status is marked as In Progress. A progress icon is displayed when the report generation is in progress and users can click the Stop button next to the progress icon to stop the report generation. For the reports that are being generated, the Last Generated column displays a hyphen (-) to indicate that the report was not generated in the recent past.
When a saved report is run, an entry is created for the report automatically in the Generated Reports tab and users can download the generated report from here. When the report generation is in progress, the Download, Print, Mail, and Schedule buttons are not displayed until the status changes to Completed.
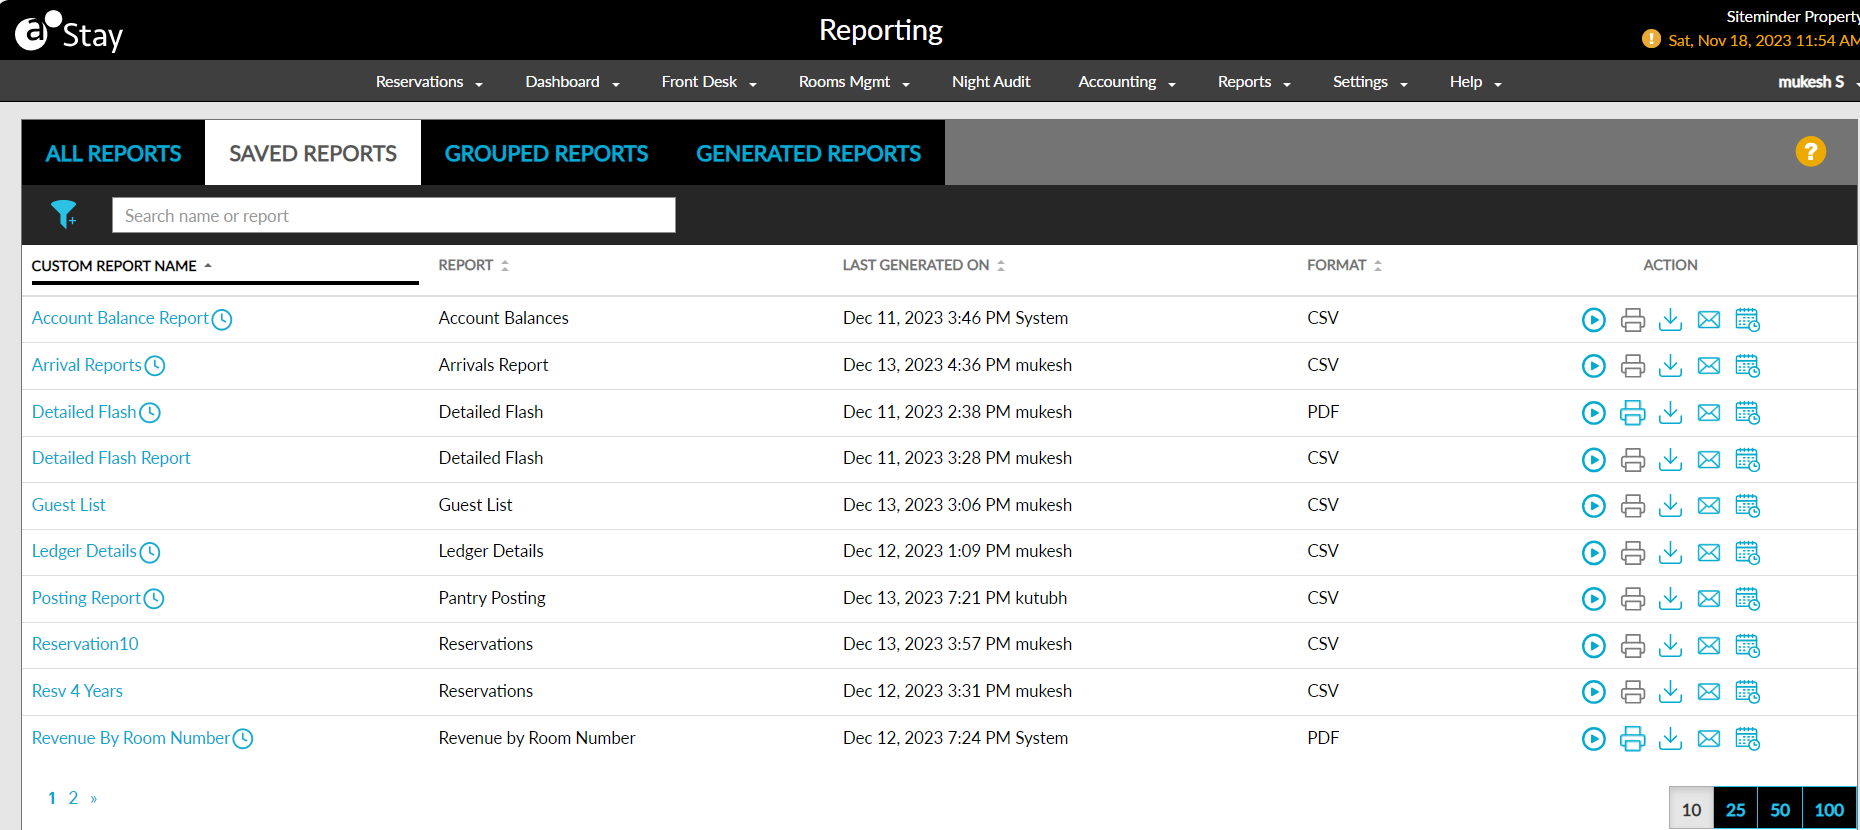
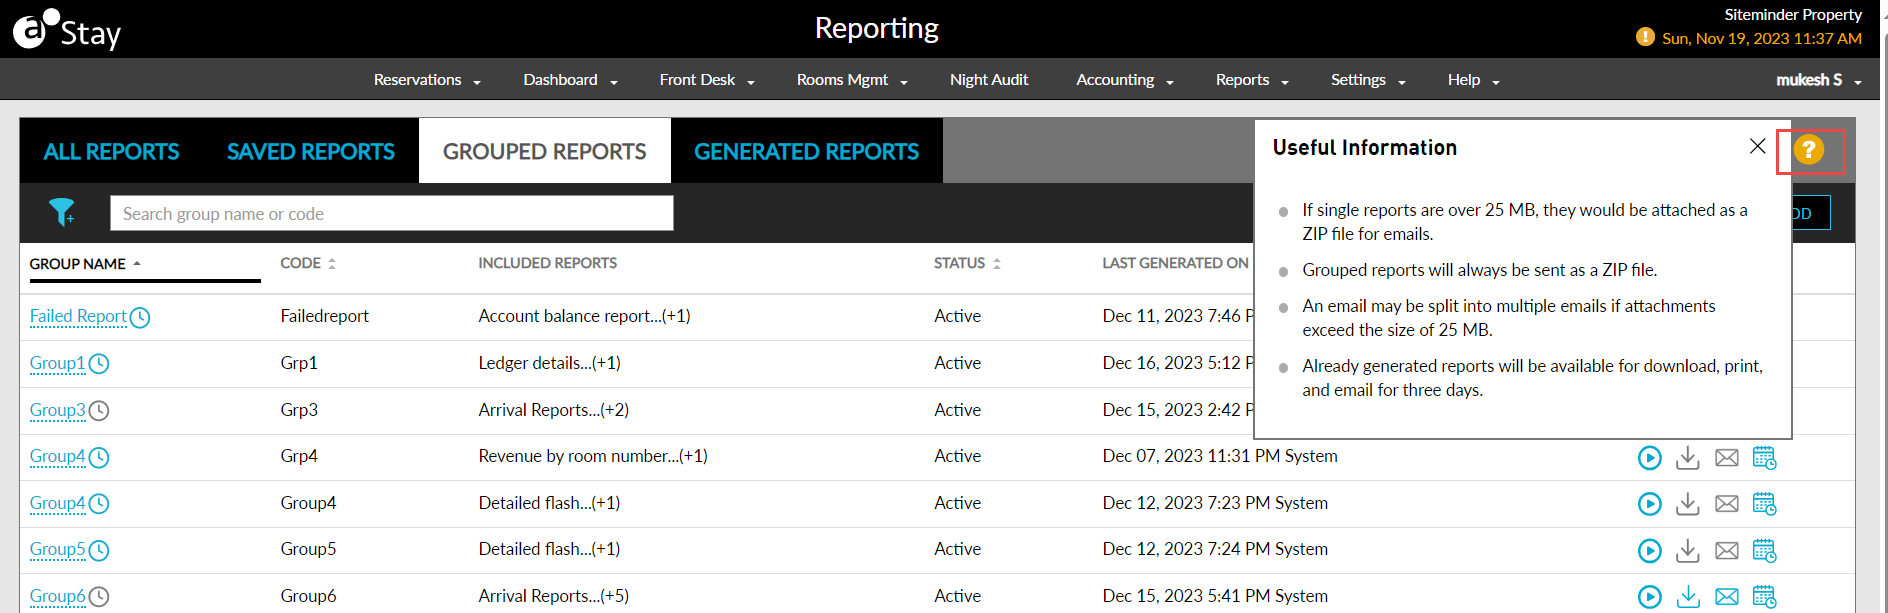
When users click the question mark icon displayed, the Useful Information pop-up appears that displays details about the Saved, Grouped, and Generated Reports.
When users try to export the report in CSV or PDF formats and when the number of records in the report crosses the threshold configured, a pop-up screen appears that displays the following message: The data that you are trying to export has exceeded the limit of X records. Please adjust the filter settings to reduce the data retrieved. Users must update the report parameters and generate the report with lesser number of records.
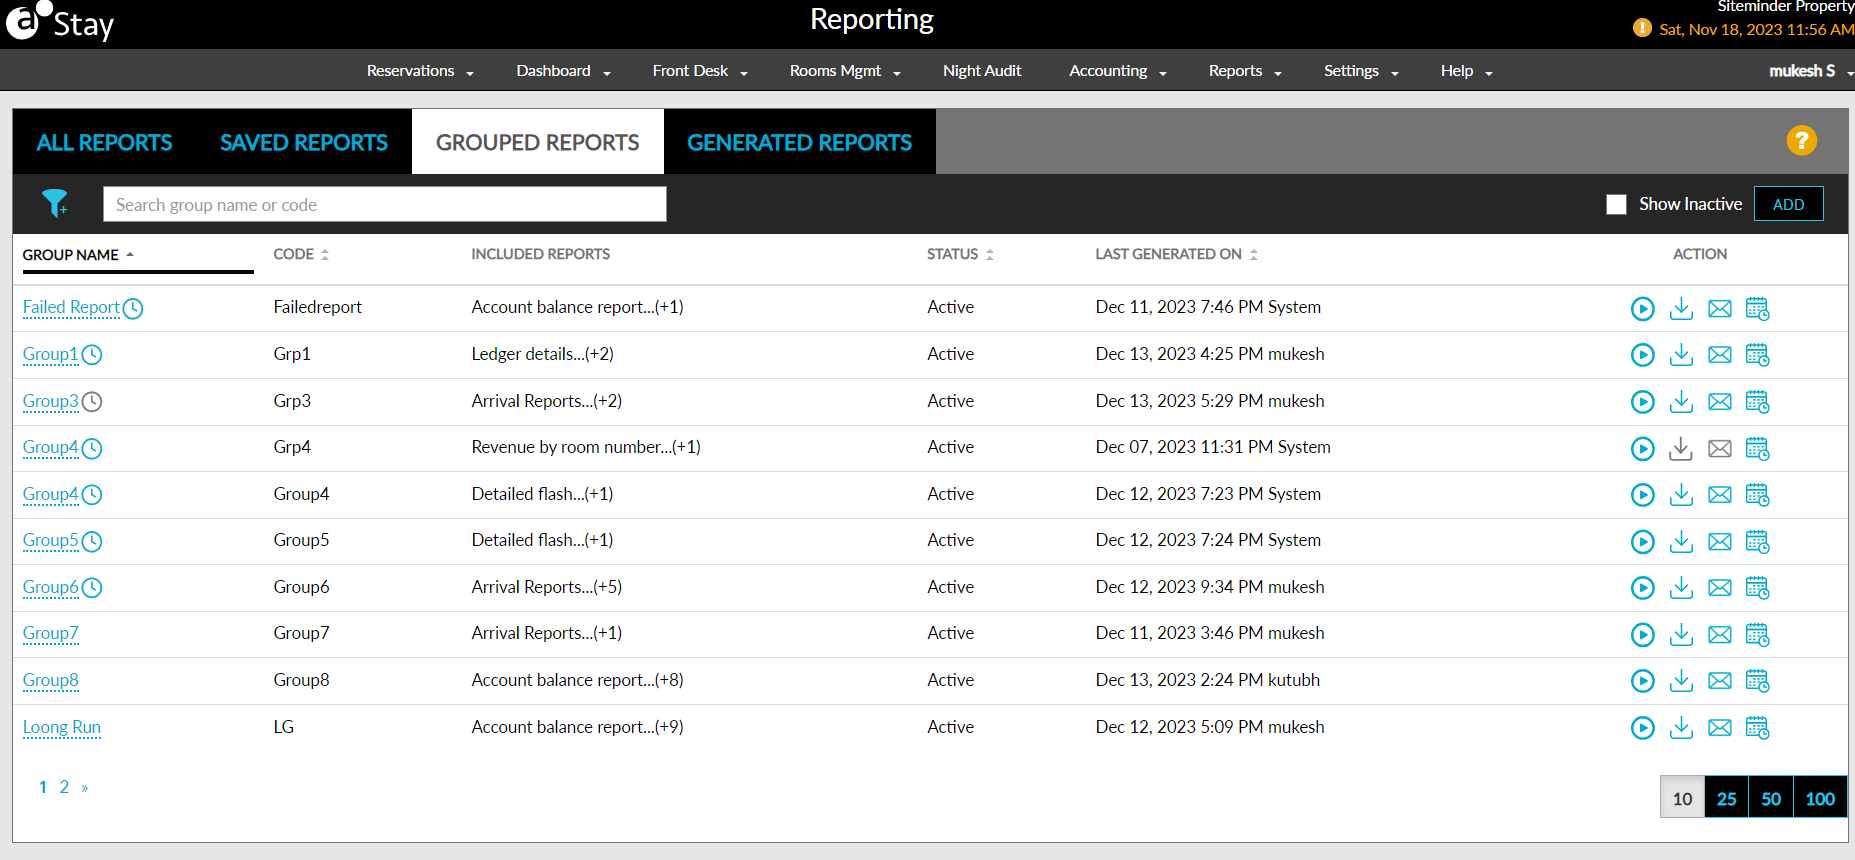
Grouped Reports
The Grouped Reports tab allows users to create, and view grouped reports. With this enhancement, users can now easily assign a set of reports to a group which can be printed, downloaded, or scheduled to be emailed at one go.
Each group is assigned a unique group code. The following columns are displayed in the Grouped Reports tab:
|
|
|---|---|
|
|
|
|
|
|
|
|
|
|
|
|
Creating Grouped Reports
Users can create a custom group where the list of reports can be added. Perform the following actions to create a new Grouped Reports:
Navigate to Reports ➜ All Reports ➜ Grouped Reports.
Click Add. The Create Grouped Reports screen is displayed.
Refer the following section and fill in the fields:
|
|
|---|---|
|
|
|
|
|
|
|
|
Click Save. The group is successfully created and displayed under the Grouped Reports tab.
Clicking cancel or closing the screen terminates the process.
Running Grouped Reports
Users can now run all the reports added to a specific group to be generated so that it can be printed, downloaded, or emailed at one go. This simplifies the process of generating specific set of reports instead of generating each report individually.
Perform the following actions to run grouped reports:
Navigate to Reports ➜ All Reports ➜ Grouped Reports. The list of grouped reports added is displayed.
Click on the run icon under the Action column of the preferred group. The Run screen is displayed.
Select the type of file, either CSV or PDF, from the respective radio buttons in the Generate As section.
Enter the email address to which the generated reports must be sent in the Email Addresses field.
Multiple email addresses, separated by a comma or a semi-colon can be entered in the field.
Click Confirm. The reports are generated to be sent.
When grouped reports are generated, the progress indicator is displayed, with the time and number of reports generated. Users can stop the process by clicking the stop icon.
If two or more users tries to run a particular grouped report simultaneously, a pop-up, Report Generation Update, is displayed with the following message: The report is currently being generated by <user>, and you can print, download, or email once it is complete.
Downloading/Printing Grouped Reports
Users can now download or print the reports added to a group at one go. Here, users have an option to print/download all reports added to the group or print/download specific reports in the group.
Perform the following actions to download/print Grouped Reports:
Navigate to Reports ➜ All Reports ➜ Grouped Reports. The list of grouped reports previously added is displayed.
Click on the download icon under the Action column of the preferred group. The Download/Print screen is displayed.
Click Download All to download all reports in the group.
Or
Click Print All to print all reports in the group.
Users can print/download individual reports by clicking the print/ download icon near the individual reports.
Click Close.
Emailing Grouped Reports
Perform the following actions to email a grouped report:
Navigate to Reports ➜ All Reports ➜ Grouped Reports. The list of grouped reports previously added is displayed.
Click on the email icon under the Action column of the preferred group. The Email screen is displayed.
Enter the email address to which the generated reports must be sent in the Email Addresses field.
Multiple email addresses, separated by a comma or a semi-colon can be entered in the field.
Click Send.
Scheduling Grouped Reports
Perform the following options to set a scheduler for grouped reports:
Navigate to Reports ➜ All Reports ➜ Grouped Reports. The list of grouped reports previously added is displayed.
Click on the calendar icon under the Action column of the preferred group. The Scheduler screen is displayed.
Configure the schedule details in the Scheduler screen.
Click Save.
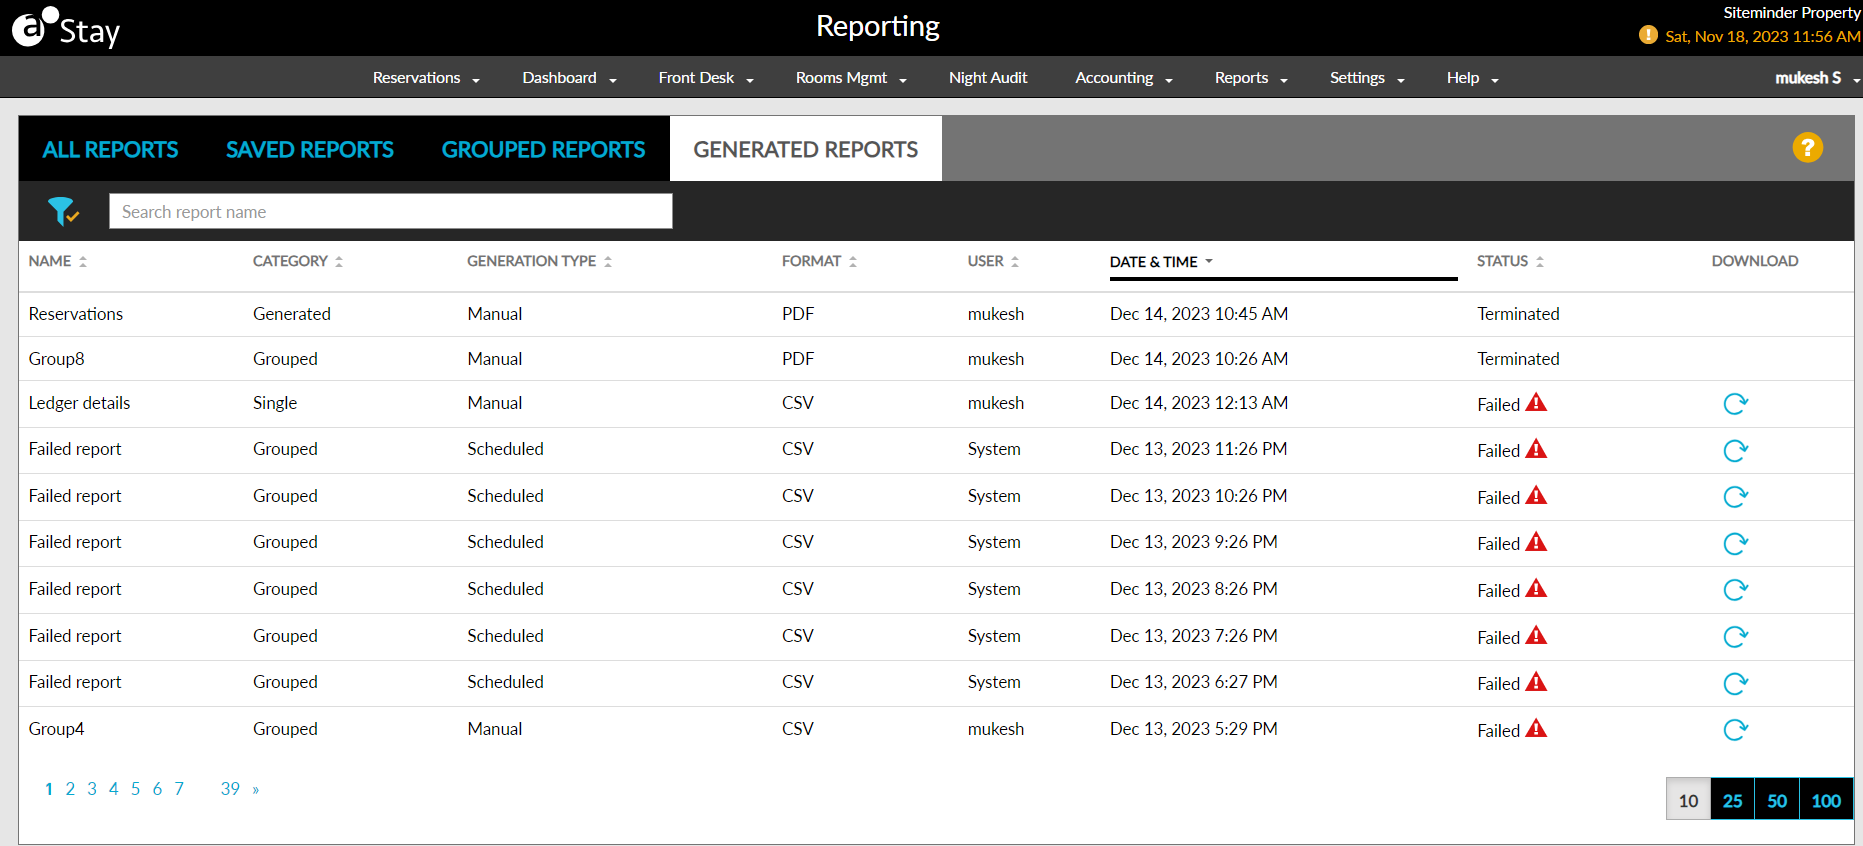
Generated Reports
This tab displays a log of reports that were generated but could not be immediately downloaded. This tab displays the following columns:
|
|
|---|---|
|
|
|
|
|
|
|
|
|
|
|
|
|
|
Reports that cannot be downloaded immediately are categorized as individually generated reports with the following criteria:
-
Category: Generated
-
Generated Type: Manual
The reports can be downloaded in the same format that was selected by the user when generating the report. If PDF format is selected, the print icon is enabled to allow users to print the report. Users cannot print the report if the selected format is CSV.
If the report generation of the selected report is in progress when users access the Generated Reports tab, the status of the report is displayed as In Progress. A progress icon is displayed under the Download column for the reports that are being generated. This icon displays the count of generated records. Users can click the Stop button to stop the report generation.
When users initiate the report generation and try to download the generated report, the preferred format must be selected to download the report. When the report takes a long time to get download due to a huge volume of data, the Report Update pop-up screen appears that displays the following message: It is taking longer than expected to generate this report due to the amount of data required. The report will continue generating in the background. To view the status and download the report, please check the generated reports.
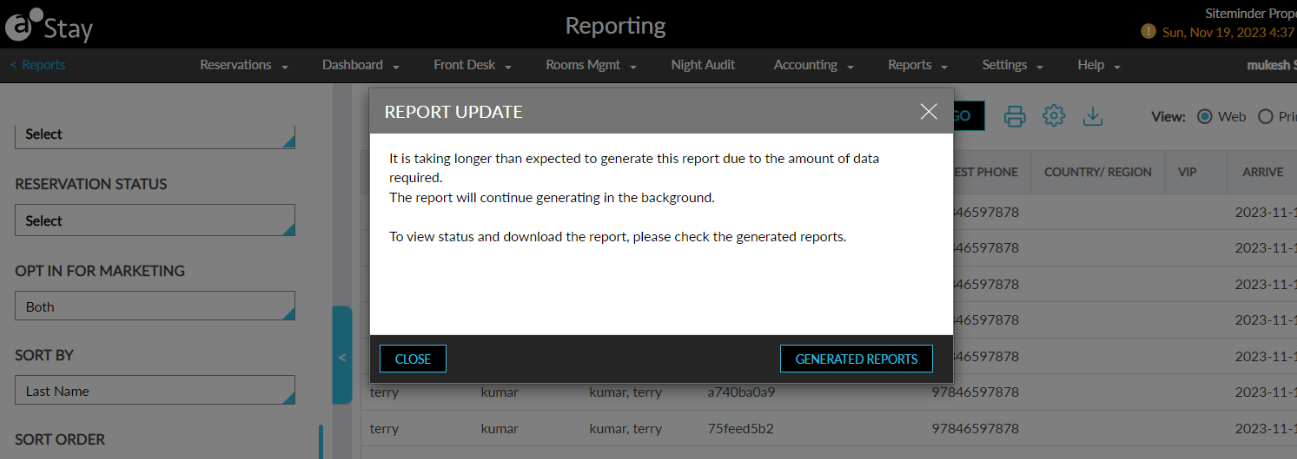
Users can choose to close this message or navigate to the Generated Reports tab by clicking the Generated Reports button.
Retry/Skip Failed Scheduled Reports
The Failed Scheduled Reports section under the Date Roll tab allows users to view the list of reports, single and grouped, that has failed to be generated during date roll.
This section is displayed in the Date Roll tab only if the Stop Date Roll on Failure option is selected for the property in the Scheduled Reports Generation (Manual/Auto Date Roll) section (Night Audit ➜Auto Date Roll ➜ Scheduled Reports Generation (Manual/Auto Date Roll)). The list of failed reports is displayed in the following format:
|
|
|---|---|
|
|
|
|
|
|
|
|
|
|
|
|
To support this feature, the following changes have been made:
-
The following new tabs have been added to the Reporting screen (Reports ➜ All Reports):
-
Single Reports - displays all custom reports saved as user favorites.
-
Grouped Reports - displays all grouped custom reports.
-
Generated Reports - displays a log of reports that were generated but could not be immediately downloaded.
-
-
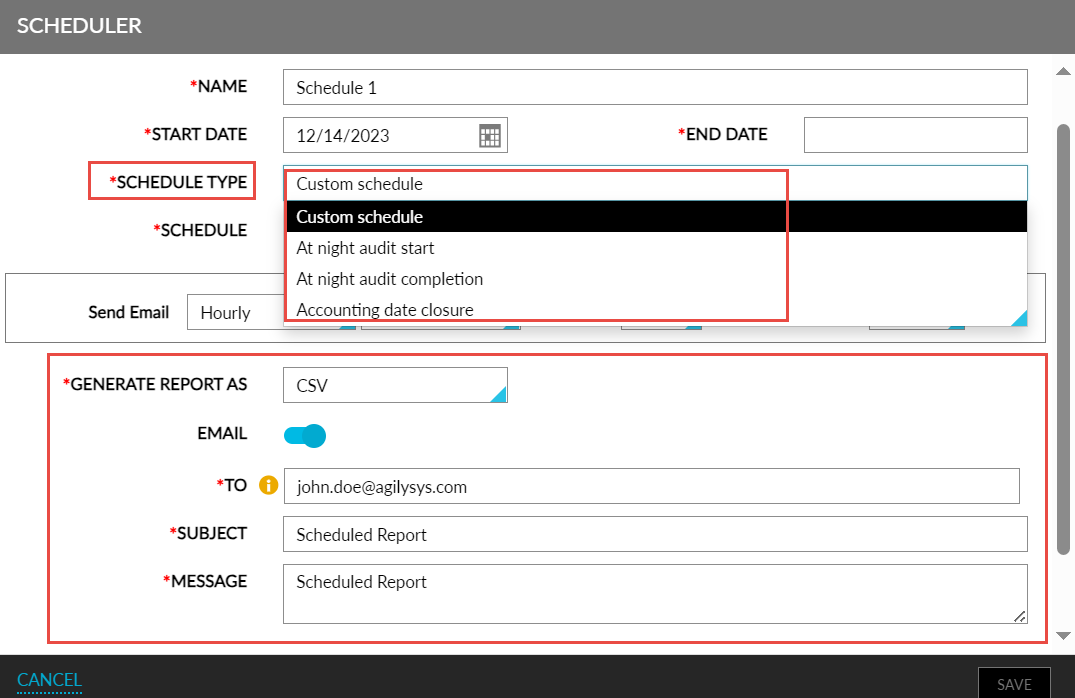
A new dropdown, Schedule Type, is added to the Scheduler screen with the following options:
-
Custom schedule - schedule the reports to run based on the following options:
-
Daily
-
Weekly
-
Monthly
-
-
At night audit start - schedule the report(s) to run as soon as the night audit process is initiated automatically or manually.
-
At night audit complete - schedule the report(s) to run after date roll.
-
Accounting date close - schedule the report(s) to run only when the accounting date has been closed either manually or as part of night audit.
-
-
A new toggle, Email, is added to the Scheduler screen that allows users to send the generated report as an email. Enabling the toggle opens three existing fields, namely:
-
To - users can enter multiple email addresses separated by a comma or a semi-colon.
-
Subject - users can enter the subject line for the email.
-
Message - users can enter the body of the email.
-
-
The Attach File As drop-down in the Scheduler screen is now renamed as Generate Report As.
-
A new section, Scheduled Reports Generation (Manual/Auto Date Roll), is added to under the Auto Date Roll tab in the Night Audit screen with the following options:
-
Continue date roll on failure - Date roll should be continued even if report generation fails. The failed report will be added to the Scheduled Reports Panel dashboard where users can retry the process again.
-
Retry once upon failure, but continue date roll - Date roll should be bought to a halt if report generation fails. Auto retry of the failed reports will be initiated and status will be displayed in the Scheduled Reports Panel dashboard.
-
Stop date roll on failure - Date roll should be stopped, and the failed scheduled reports list are displayed in the Date roll page of Night Audit. Users can either retry generating the reports or skip the process before initiating date roll.
-
-
A new section, Failed Scheduled Reports, is added to the Date Roll tab in the Night Audit screen which displays all failed single and grouped report. This section is displayed only if the Stop date roll on failure option is selected for the property.