Invoice#
The Invoice screen allows users to create a custom footer message, add additional recipients, and remit-to address for the property.
The feature setting named AR Remit To must be enabled to add remit-to addresses.
Perform the following steps to set up the invoice template:
Navigate to Settings ➜ All Settings ➜ Templates ➜ Invoice#.
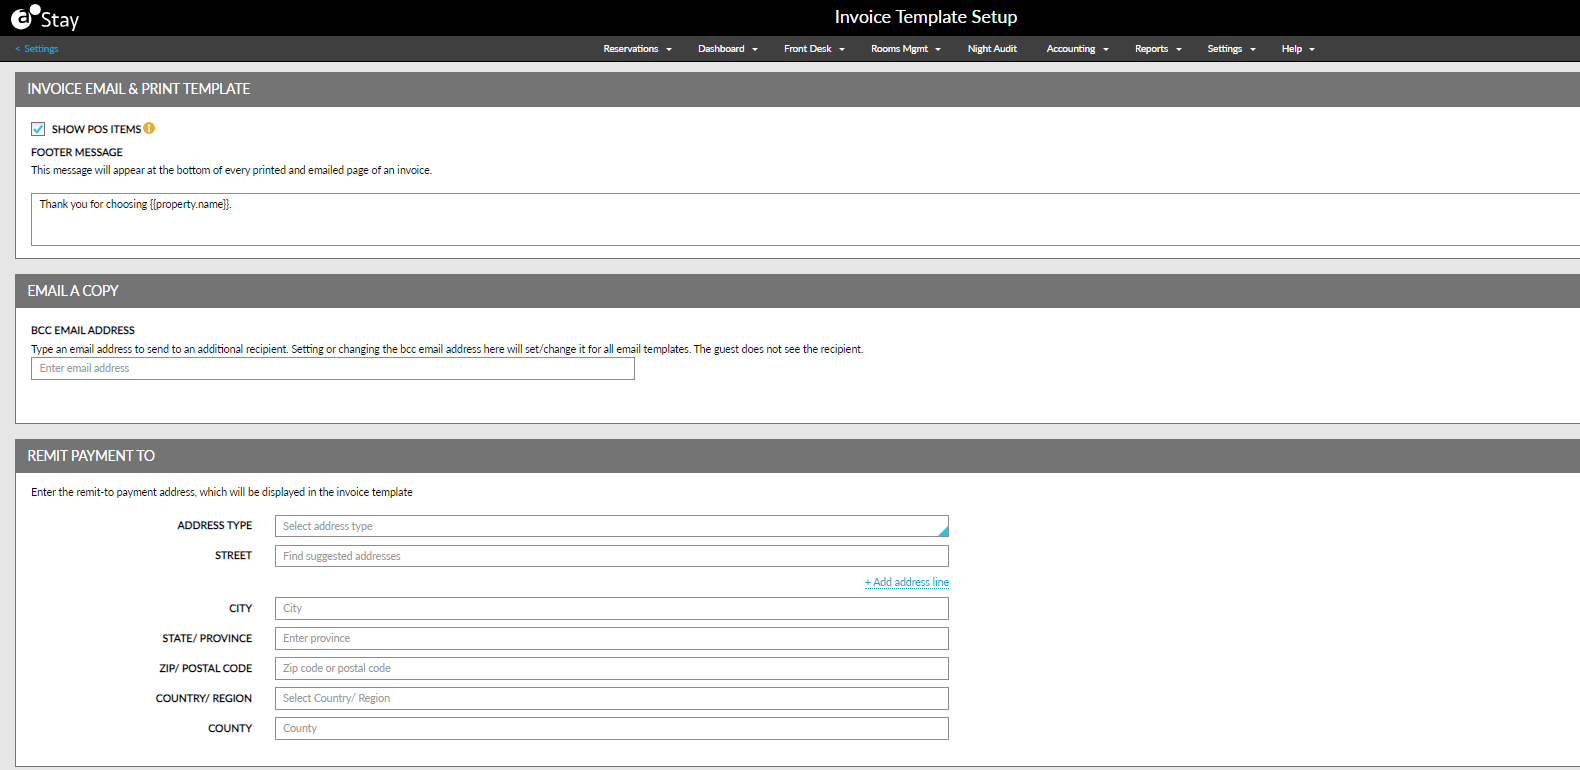
Enter the custom footer message, such as the property name and contact information, in the Invoice Email & Print Template section. Users can use HTML to format the message.
If the message is long, use the arrow keys to move up and down. Or click and drag the corner of the message box to the size needed.
Enable the Show POS Items checkbox to display the split-up of the charges of items posted from a POS system outlet as a separate line entry in the A/R invoices. When disabled, the grand total of the charges of items posted from a POS system outlet is displayed against the outlet name in the A/R invoices.
Enter the email address to send the item to an additional recipient in the Email A Copy section.
Changing the email address here changes it for all other templates with a specific BCC address.
Enter the remit-to address for the property in the Remit Payment To section.
Click Save to save the template.