Setting Up Folio and Routing Rules for a Group
Add a new folio to a group's master folio to separate different charges outside of the default group folio for settlement. These are often known as delegate folios. These folios provide a breakdown of costs outside of room charges. For example, a group may want to separate their food and beverage charges from the group room charges. Users can add a new folio to a group profile at any point before checkout. There is no limit to the number of folios that can be created.
Navigate to Reservations ➜ Profiles.
Click the Groups tab to view the group reservations.
Click the group name for which the status of a room block must be checked. The group's detail page appears.
If the list of groups is long, use the Group Status filters on the Groups tab to narrow the results.
Click the Folio & Routing Rules tab.
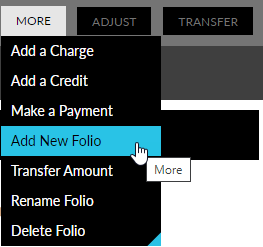
Click More drop-down list to the right side of the screen, in Folio Summary.
Choose Add New Folio from the folio summary list to open the Add a New Folio dialog box.
Enter a Folio Name.
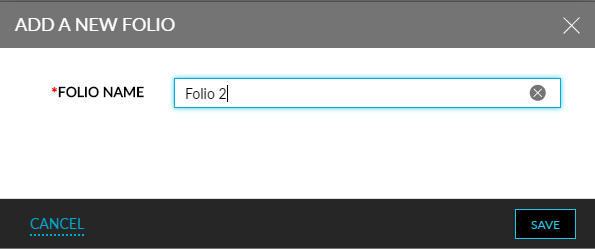
Click Save. The new folio appears in the list under Folio Summary.
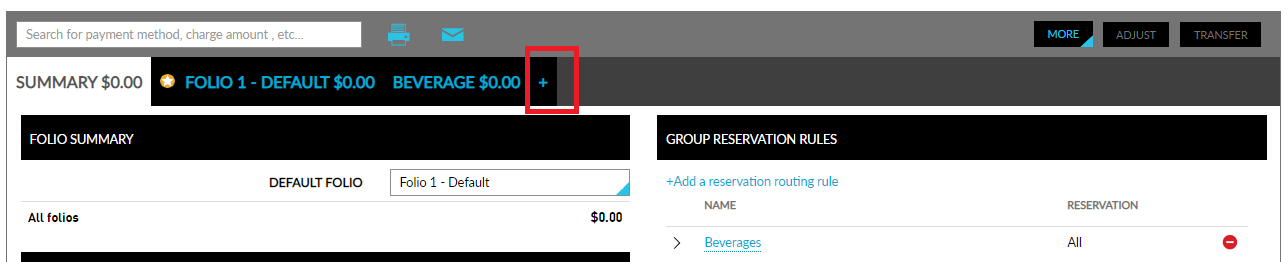
Alternatively, a new folio can also be added by clicking the plus icon as shown on the following screen.
Users can also redeem comps for the items in group folios. The existing comp functionality that is available in individual reservation folios is now implemented in group folios.
Users can redeem comp for any transaction and inventory items posted to any of the group folios. Users can use both Admin Comp and Player Self Redeem options. For Player Self Redeem, the profile associated with the group is considered and the comp balance of that profile is displayed and available for redeeming.
Once redeemed, a comp folio is created with the following details:
-
Date
-
Description
-
Comp Type
-
Quantity
-
Amount
-
Tax
-
Payment
-
Total
-
Reverse Comp Option
-
Change History
Click on More ➜ Comp. The Comp screen that exists in individual reservations is displayed. All the folios in the group are listed in the Comp screen for redemption. Users can redeem comp for any of the transaction or inventory items that has the Allow Comp flag enabled in the setup (Settings ➜ Guest Accounting ➜ Items ➜ Transaction Items).

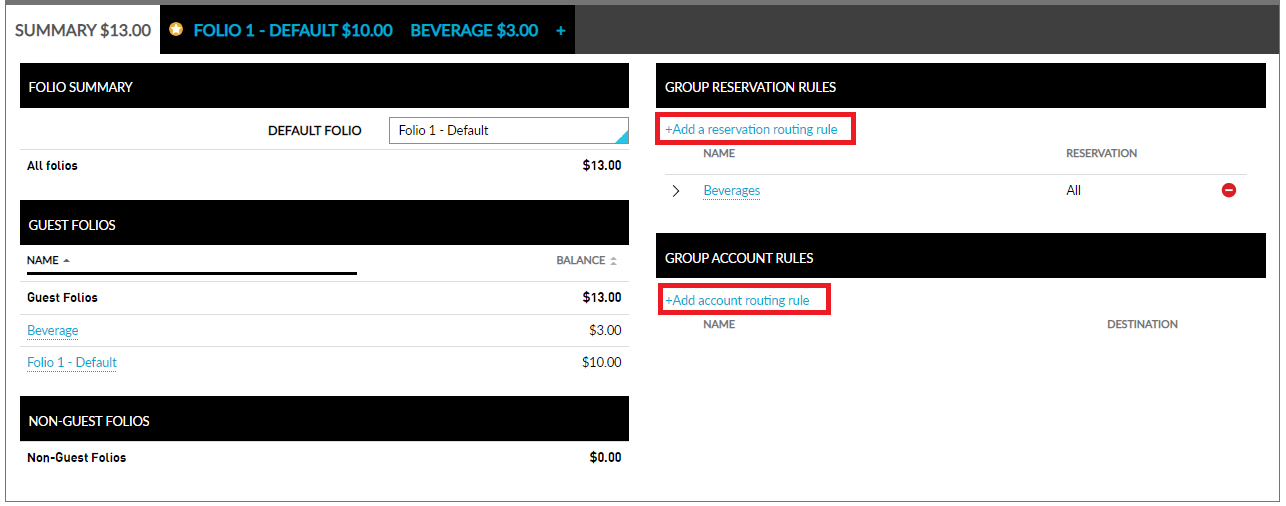
Click Add a reservation routing rule or Add account routing rule to add folio routing rules for the reservation or to add the charges to an A/R account, respectively.
Choose an existing routing rule template from the Select Template drop-down list in the Add Routing Rule pop-up.
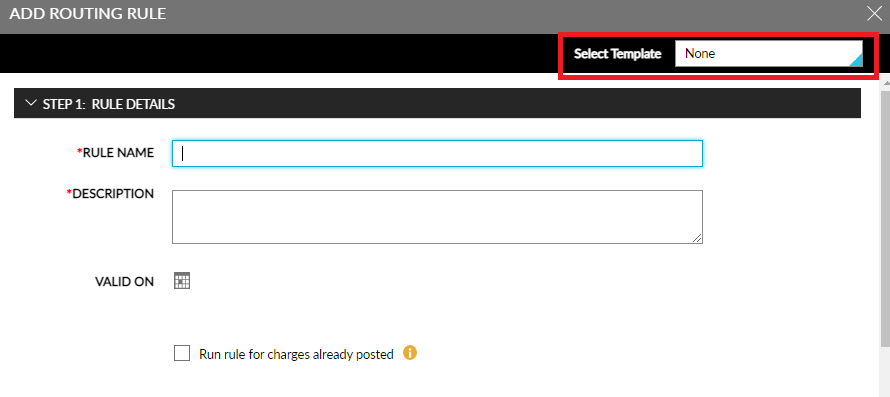
Add the Rule Name, Description, valid dates in the calendar by clicking Valid On, and select the checkbox Run rule for charges already posted if the rules should be applied for existing charges.
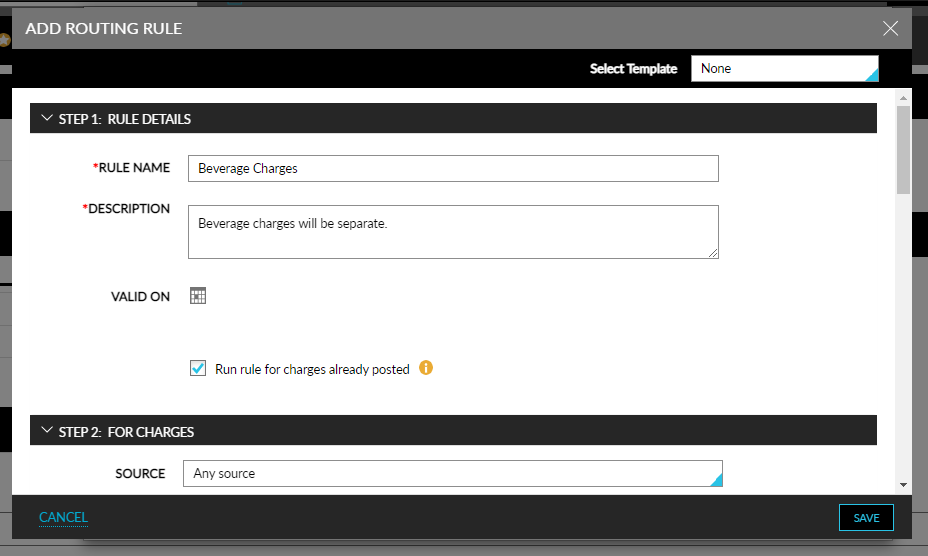
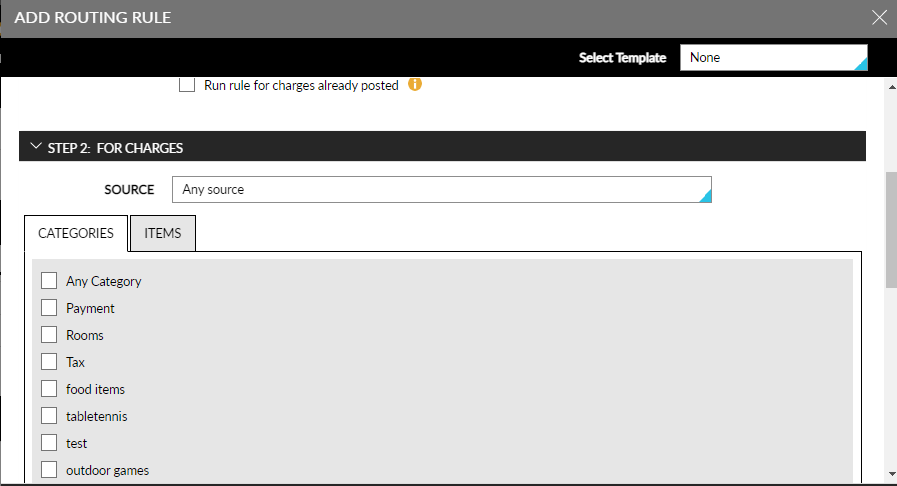
Choose any source from the Source drop-down list, select the Categories and Items from the respective tabs in the For Charges section.
Select the checkbox Route Deposit in the right of the screen to auto-route deposit charges to a destination account.
Once this checkbox is enabled, the Deposits section is visible below the Charges section. Users can add the preferred folio in the Deposit section.
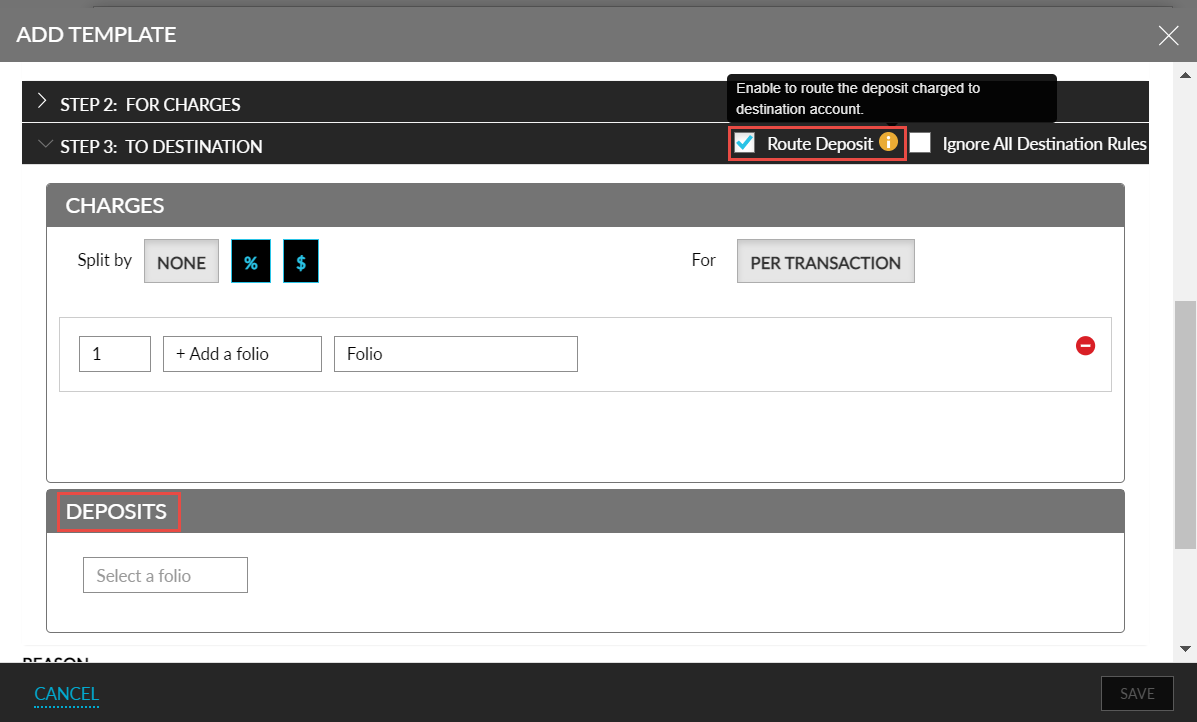
Select the checkbox Ignore All Destination Rules in the right of the screen to ignore any previous rules set in the destination, under the To Destination section.
Select a folio and split based on a percentage or a fixed dollar amount.
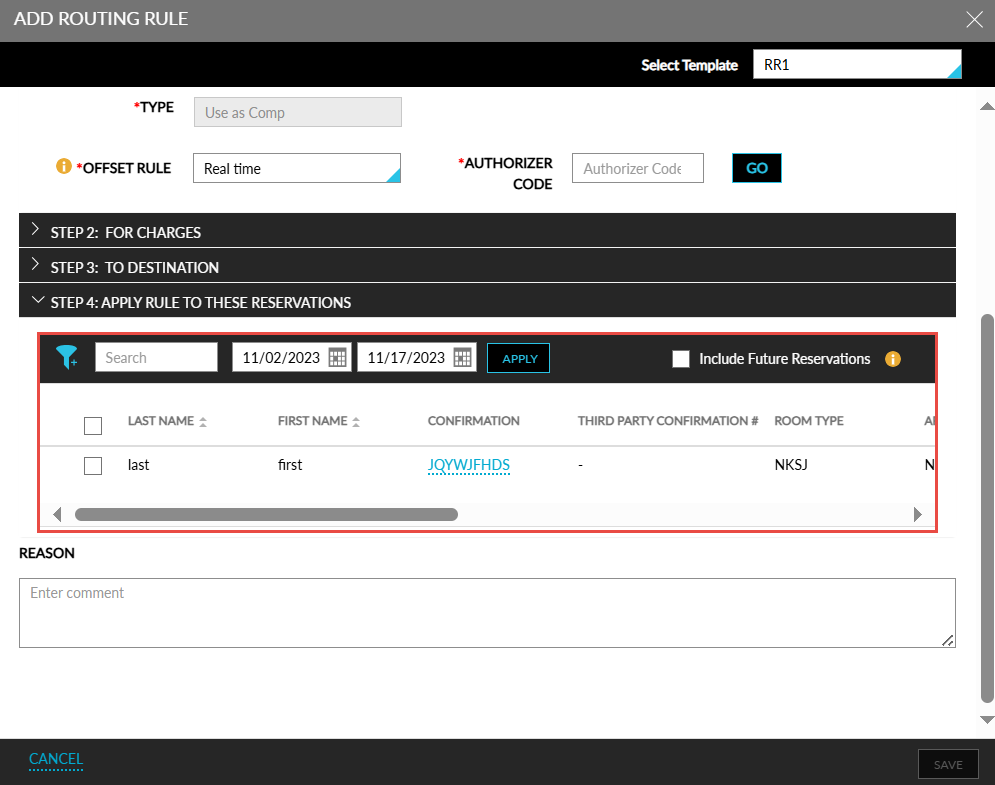
Chose a specific name or reservation number in the Apply Rule To These Reservations section, apply to a particular reservation, or select the All reservations in group checkbox.
The following details are displayed in the Step 4: Apply Rule to These Reservations section:
|
Column |
Description |
|---|---|
|
Last Name |
The last name of the primary guest associated with the reservation. |
|
First Name |
The first name of the primary guest associated with the reservation. |
|
Confirmation |
The confirmation number of the reservation displayed as a hyperlink. When clicked, the reservation is displayed in a new tab. For shared reservations, an indicator is displayed next to the confirmation ID. When hovered upon, the text, Shared Reservation, is displayed. |
|
Third Party Confirmation # |
The third-party confirmation numbers of reservations displayed in the following format: Confirmation Code - Confirmation Number. When more than one third-party confirmation number is available for a reservation, they are displayed as a comma separated list. |
|
Room Type |
The room type code of the reservation. |
|
Arrival Date |
The arrival date of the reservation. |
|
Departure Date |
The departure date of the reservation. |
|
Shared Reservation |
The confirmation IDs of the reservations that are shared with this reservation displayed as a hyperlink. When multiple reservations are shared, they are displayed as a comma separated list. |
|
Shared Guests |
The guest name associated with the reservations shared with this reservation. When there are multiple guest names, they are displayed as a comma separated list. |
|
Company Name |
The company name associated with the reservation. |
|
Loyalty |
The loyalty program associated with the reservation along with the tier details in the following format: Loyalty program - Loyalty tier. |
|
VIP |
The VIP status associated with the reservation. |
An accordion is displayed for the primary shared reservations which when expanded displays all the reservations that are shared with the primary reservation. For secondary reservations, the shared indicator is not displayed. When the secondary reservation is not associated with the group, the reservation is not displayed in this section.
When there are different primary reservations for each day, the first primary reservation is displayed as the primary reservation when grouping the reservations. For example, when two reservations are shared for two days, where, on the first day, the first reservation is set as primary, and on the second day, the second reservation is set as primary. In this case, when displaying reservations for the group, the first reservation is displayed as the primary reservation always.
When only the second reservation is associated with the group, it displayed with the shared indicator but without the accordion.
The following columns in the section can be sorted:
-
First Name
-
Last Name
-
Arrival Date
-
Departure Date
-
Loyalty
-
VIP
-
Company Name
Users can search for a reservation using the following details:
-
Loyalty
-
Room Type
-
First Name
-
Last Name
-
Shared Guests
-
Third Party Confirmation
-
VIP
-
Company Name
-
Confirmation Number
Users can retrieve reservations for a preferred date range by selecting the start and end dates in the date pickers provided. By default, the arrival and departure shoulder dates are displayed. When shoulder dates are not available for a group, the arrival and departure dates of the group are displayed. Users cannot select a date beyond the mentioned dates.
Users can filter records based on the following:
-
Loyalty
-
Room Type
-
Shared Reservation
Users can select the checkbox of the preferred reservations to which the rule must be applied. To apply the routing rule to all future reservations created for the group, users must select the Include Future Reservations checkbox. This checkbox is selected by default when there are no reservations created for the group.
Enter comments if required in the Reason textbox.
Click Save to save the routing rule.
Properties can capture and hold authorizations for your group contracts to ensure that the group account has sufficient credit to support any expected charges being routed to the group folio. Users can manually authorize a credit card from the Folio and Routing Rules tab in Groups and the authorized amount will display on the group screen. Pre-authorization can be done for any amount