Setup
This menu includes the following options:
-
Staff - allows users to create new staff details
-
Patterns - allows users to create new housekeeping patterns for when the specific services must be performed
-
Order & Sections - allows users to group the rooms into sections
-
Services - allows users to create new housekeeping services
-
Guest Services - allows users to add housekeeping guest services other than those related to cleaning
-
Condition - allows users to create housekeeping conditions at the property
-
Roles - allows users to create all the various roles associated to housekeeping services
-
Capacity - allows users to manage housekeeping capacity to balance workloads
Staff
The Staff option allows users to create new staff details for housekeeping. After the user has defined all the housekeeping roles and service details, the user can add staff and assign them housekeeping roles. Users can enable the Display last name as initials in prints and reports checkbox, to display only the first letter of a staff’s last name, in housekeeping print and the following legacy reports:
-
Housekeeping Checkoff report
-
Housekeeping Supervisor report
Perform the following steps to create housekeeping staff members:
Navigate to Rooms Mgmt ➜ Housekeeping ➜ Setup. The Staff tab is displayed by default.
Click Add New. The New Staff dialog box appears.
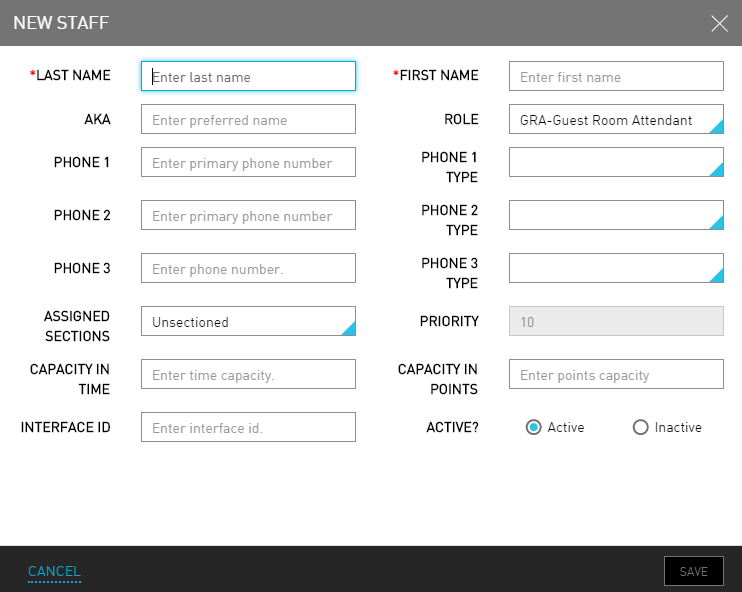
Refer to the following table and fill in the fields to create a new housekeeping staff:
|
Field |
Description |
|---|---|
|
Last Name |
The last name of the staff member. |
|
First Name |
The first name of the staff member. |
|
AKA |
Also Known as. Any other name the staff member would like to be called. |
|
Role |
The housekeeping role to be performed by the staff member. |
|
Phone |
The phone number of the staff member. |
|
Phone Type |
The type of phone number of the staff member. |
|
Assigned Sections |
The specified section under which the staff member is assigned to work. |
|
Priority |
The priority order determines room assignment order. Housekeepers with a lower priority may not get all 16 points or 8 hours of work if there are not enough rooms to service that day. |
|
Capacity In Time |
The time capacity of the staff member. |
|
Capacity In Points |
The points capacity of the staff member. |
|
Interface ID |
The unique interface ID of the staff member. |
|
Active? |
Indicates that the staff member is available for assignment. |
The assigned points or time per room, as well as the assigned services, are listed on the Assign page in Housekeeping.
Click Save. The new housekeeping staff is created successfully.
Repeat these steps to add all the housekeeping staff. The staff details are created successfully.
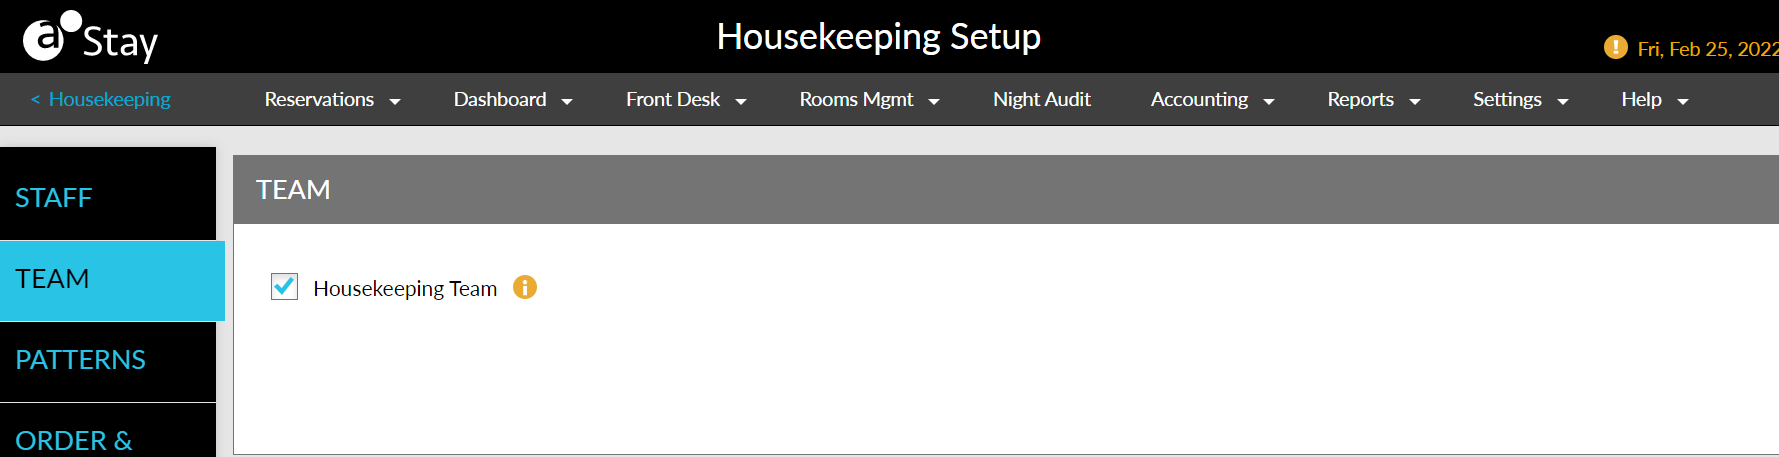
Team
This tab displays the checkbox, HousekeepingTeam. Users with the Stay_WriteHKTeamsSetup permission can enable this checkbox.
Patterns
The Patterns option enables the user to set a pattern for when specific services must be performed. For example, on the first full day that a guest is in house, a service request is triggered for Stay over Service and Stay Over Service Inspect. It also triggers a Checkout Service and Checkout Service Inspect on the last date of the guest’s stay. The user can modify this default pattern or add new patterns. For example, the user may want to define a different pattern for a Short Stay or Extended Stay.
Perform the following steps to create a new pattern:
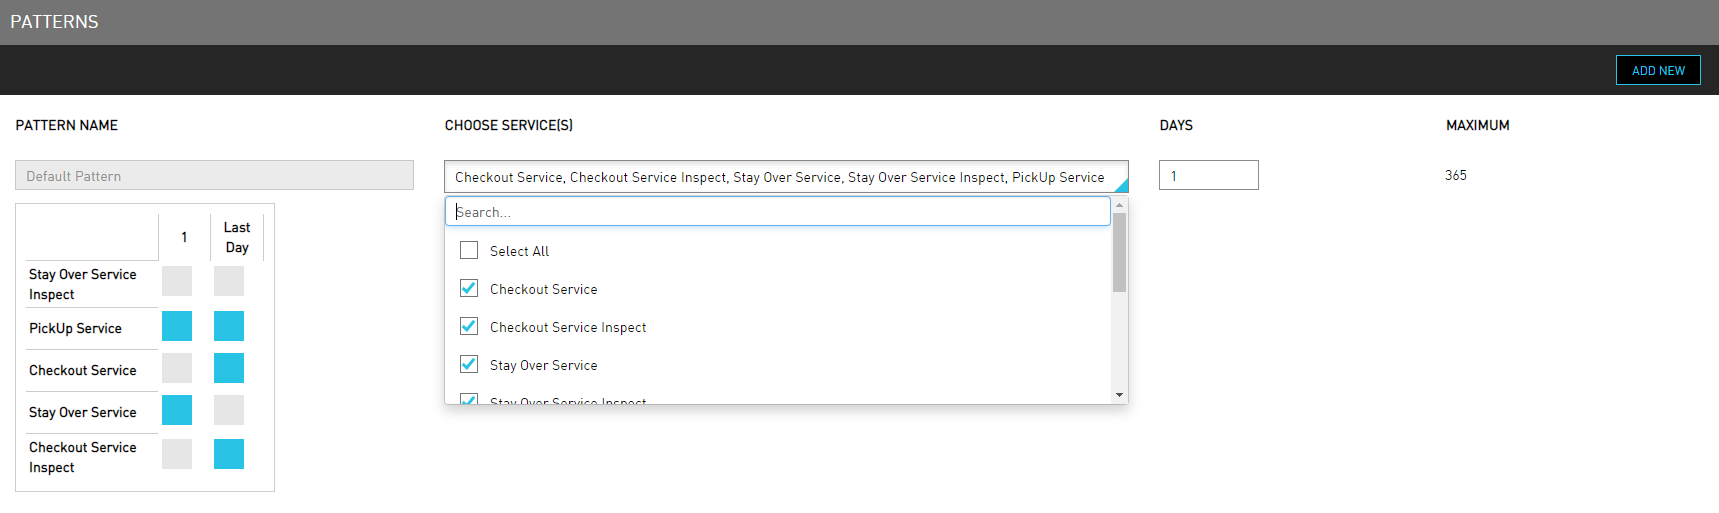
Navigate to Rooms Mgmt ➜ Housekeeping ➜ Setup ➜ Patterns.
Click the boxes next to the service name to set the default housekeeping pattern for the property or click a blue box to remove that service from the default pattern.
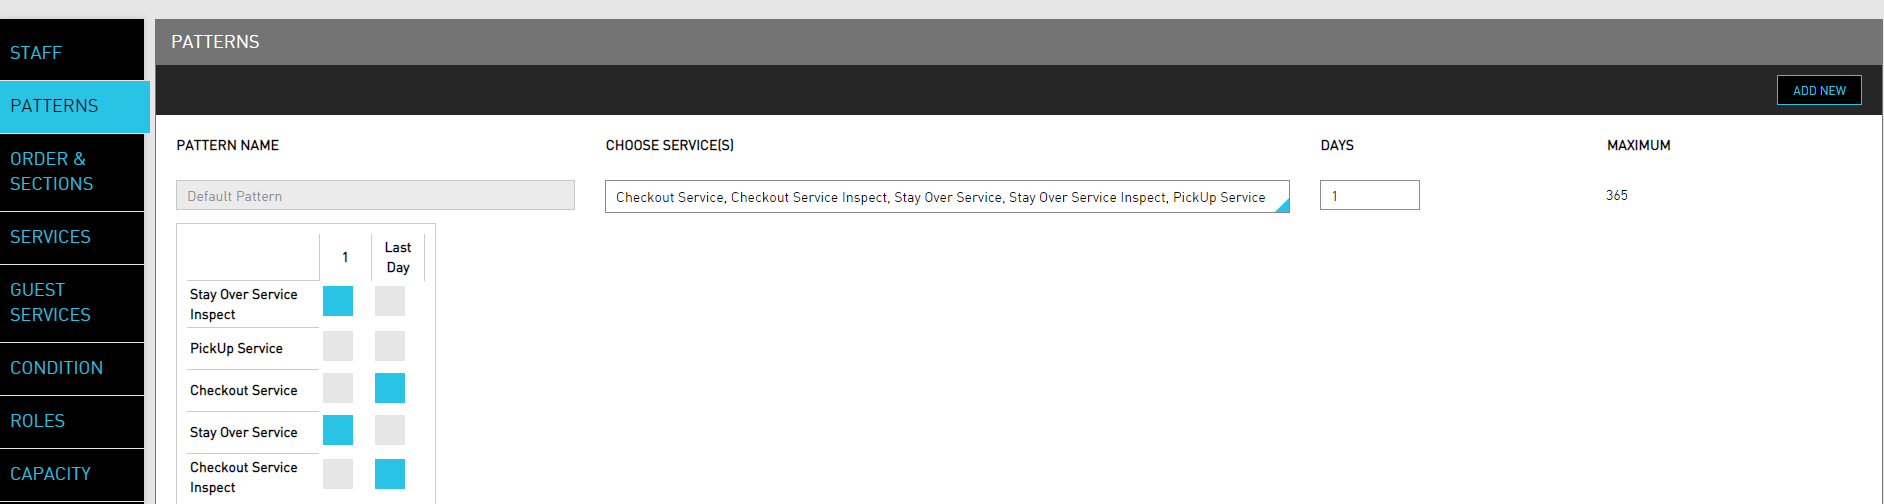
To extend the default pattern beyond just the first and last day of a stay, enter a number in the Days box that represents the length of a housekeeping pattern.
Click Save.
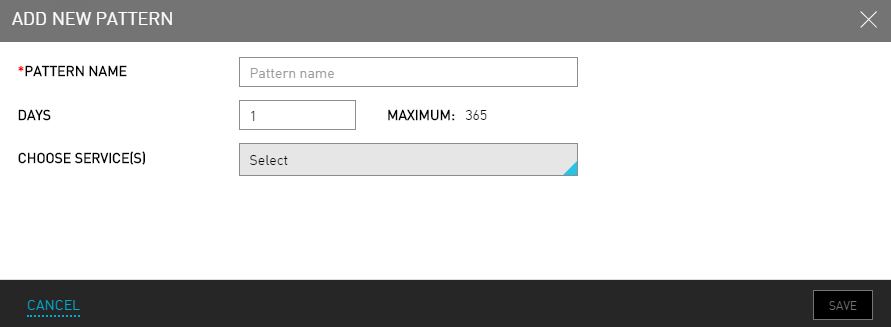
To create a new pattern, click Add New. The Add New Pattern dialog box appears.
Refer to the following table and fill in the fields to create a new pattern:
|
Field |
Description |
|---|---|
|
Pattern Name |
The name of the pattern. |
|
Days |
The frequency of days the service would occur. For example, enter 1 if the service must occur on the first full day that the guest is in house, or enter 3 if the user wants the pattern to repeat every three days. The maximum number of days is 365. |
|
Choose Service(s) |
The services that must take place as part of this pattern. |
The new pattern appears under the default patterns.
Click the boxes next to the new service name to set the pattern. Selected boxes (days) are part of the pattern and unselected, gray boxes (days) are not.
Click Save. The new pattern is created successfully.
Order and Sections
The Order & Sections option allows users to group rooms into sections to make the housekeeping assignments more streamlined and efficient. Sections helps the users to divide the property into areas that can be assigned to housekeeping staff. For example, the user can divide the property into floors (Floor 1, Floor 2, Floor 3, and so on), or wings (Left Wing, Center Wing, Right Wing), or any other way that breaks an area down into a reasonable size for housekeeping.
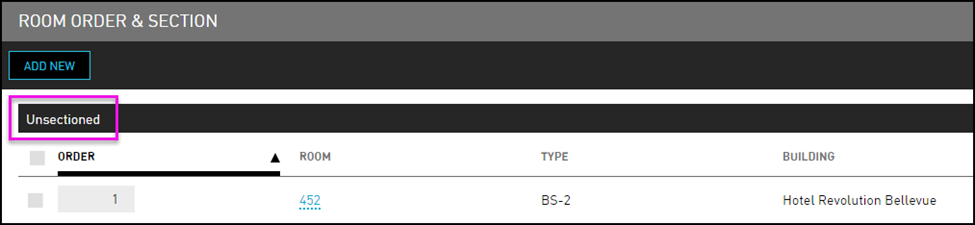
After the user creates sections, the user needs to move the rooms into each section. As the user add rooms, they appear in the Unsectioned area of the Room Order & Section page.
The final step is to organize the rooms in each section into an efficient order. For example, the user can organize in a way that housekeeping is moving down the hall room-by-room, or across the hall and back, rather than moving back and forth between hallways. This will help decrease time spent moving between rooms.
Perform the following steps to create a new section:
Navigate to Rooms Mgmt ➜ Housekeeping ➜ Setup ➜ Room Order & Section.
Click Add New. The New Section dialog box appears.
Enter the name for the new section in the Name field.
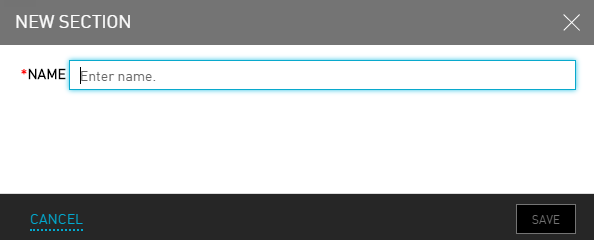
Click Save.
The user can create many sections. For example, organizing by floors is a common approach. Create a section for each floor.
Select the checkbox next to any room in the Unsectioned area.
Click Move to Section. The Move To Section dialog box appears.
Choose which section the room is located from the Move To list

Click Save.
All room order and section changes are effective going forward and do not apply to existing service requests.
Within the sections listed on the Room Order & Section page, type the order in which the rooms must be cleaned. For example, 1, 2, and so on.

Services
The Services option allows users to create services at the property. There are different responsibilities, or service types, that each housekeeping role is responsible for providing. There are many available default services, such as Checkout Service, Checkout Service Inspect, and more. If the property offers additional services, the user can add more types.
Perform the following steps to create housekeeping services:
Navigate to Rooms Mgmt ➜ Housekeeping ➜ Setup ➜ Services.
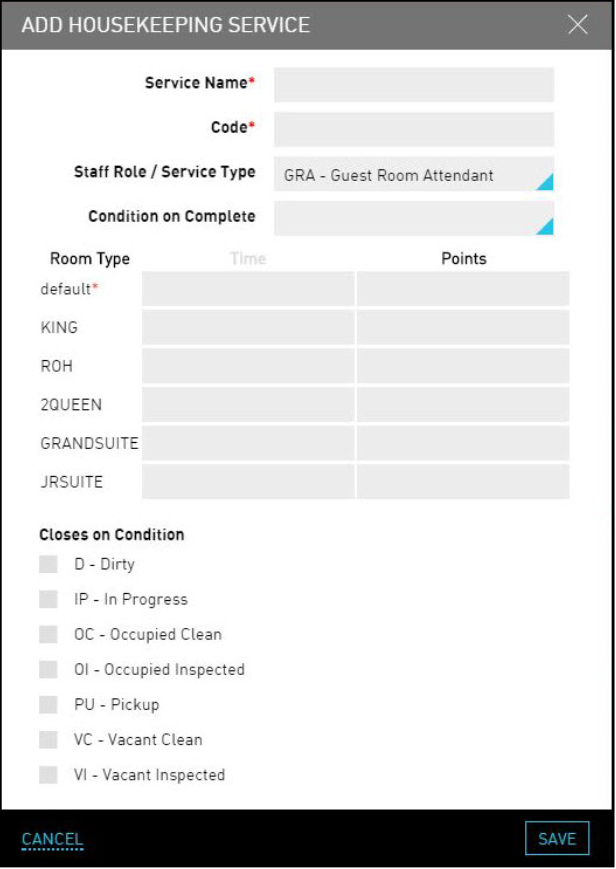
Click Add New. The Add Housekeeping Service dialog box appears.
Refer to the following table and fill in the fields to add the services:
|
Field |
Description |
|---|---|
|
Service Name |
The name of the service. |
|
Code |
A unique code to identify the service. |
|
Staff Role / Service Type |
The housekeeping role assigned for the service. |
|
Condition On Complete |
The room condition after the service is complete. For example, once a Guest Room Attendant has completed the Checkout Service type, the room condition is Vacant Clean. |
|
Room Type |
The type of room in which the service is performed. |
|
Time |
The default time allocated for the room type. |
|
Points |
The default points allocated for the room type. |
Other roles can also perform the service if they are manually assigned.
Choose what the room condition must be after the service has been provided from the Condition on Complete list. For example, once a guest room attendant has completed the checkout service type, the room condition is Vacant Clean.
The user can also customize by room type.
Select the appropriate Closes on Condition type to indicate that a service is complete when a room status is changed to that type. For example, the Full-Service type is completed when the room status changes to Vacant Clean (VC) or Vacant Inspected (VI).
Click Save. The new service is created successfully.
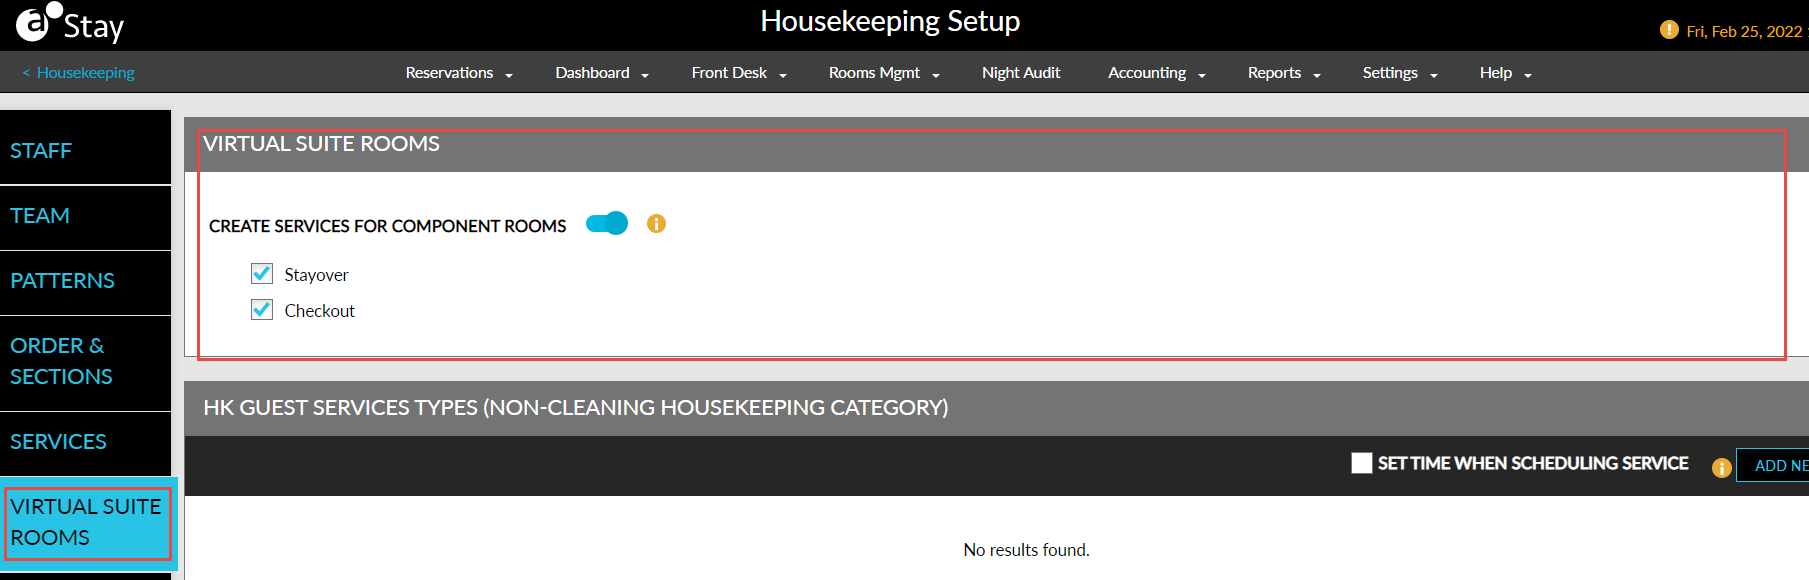
Virtual Suite Rooms
This tab displays the flag, Virtual Suite Rooms, in the Housekeeping Setup screen that displays the new flag, Create Services for Component Rooms. When enabled, the following new options are selected by default:
-
Stayover: This checkbox is disabled when the Create Services for Component Rooms flag is disabled. When enabled, all the stayover service requests for the day are created for each individual component room instead of the virtual suite, during date roll.
-
Checkout: This checkbox is disabled when the Create Services for Component Rooms flag is disabled. When enabled, all the checkout service requests for the day are created for each individual component room instead of the virtual suite, during date roll.
Guest Services
The Guest Services option allows users to add housekeeping guest services other than those related to cleaning.
Perform the following steps to create housekeeping guest services:
Navigate to Rooms Mgmt ➜ Housekeeping ➜ Setup.
Click Guest Services tab or scroll down the page.
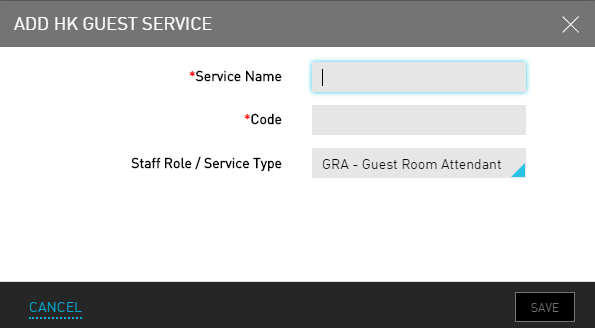
Click Add New. The Add HK Guest Service dialog box appears.
Refer to the following table and fill in the fields to add a guest service:
|
Field |
Description |
|---|---|
|
Service Name |
The name of the guest service. |
|
Code |
A unique code to identify the guest service. |
|
Staff Role / Service Type |
The staff role or service type associated with the guest service. |
Click Save. The guest service details are created.
Condition
The Condition option allows users to quickly review the housekeeping conditions at the property and make any necessary changes per room or in bulk. There are many default room conditions, including Dirty, In Progress, Occupied Clean, and more. If the property manages additional conditions, the user can add more. Enable the Alert Room Discrepancy checkbox, to allow only authorized users to update the housekeeping condition for a discrepant room. When disabled, all users will be able to update the housekeeping condition for a discrepant room.
Perform the following steps to create a new condition:
Navigate to Rooms Mgmt ➜ Housekeeping ➜ Setup ➜ Condition.
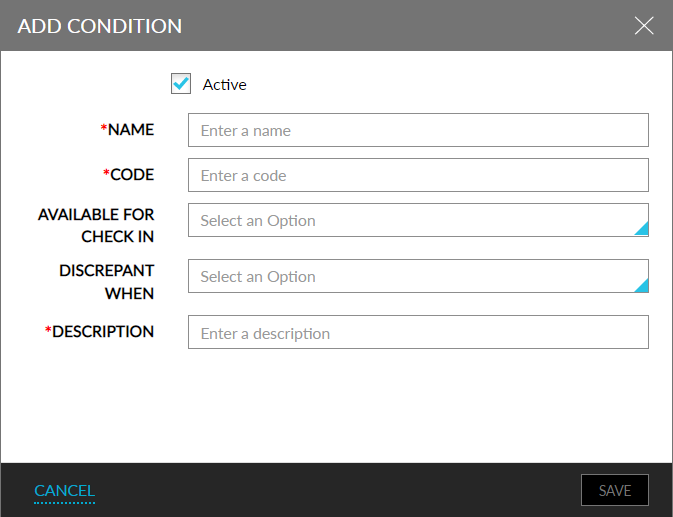
Click Add New. The New Condition dialog box appears.
Refer to the following table and fill in the fields to add housekeeping conditions:
|
Field |
Description |
|---|---|
|
Active |
Only the following conditions can be activated or deactivated:
|
|
Name |
The name of the room condition. |
|
Code |
A unique code to identify the condition. |
|
Available For Check-In? |
The status of the room for check-in purpose. For example, a room that is dirty or out-of-order must not be available for a guest to check-in. |
|
Discrepant When |
Indicates when there is a discrepancy between the occupancy status of a room versus its housekeeping status. For example, if the user adds a Vacant condition, the user must need to indicate that there must be a discrepancy if the room status is set to occupied. |
|
Description |
The description of the room condition so it is easy to identify what is needed. |
Click Save. The new condition is created successfully.
Users with access to the following roles will be allowed to change the housekeeping condition for a discrepant room:
-
System Administrator
-
Stay Hotel Manager
-
Department Manager
-
Stay Hotel Supervisor
-
Stay Housekeeping Supervisor
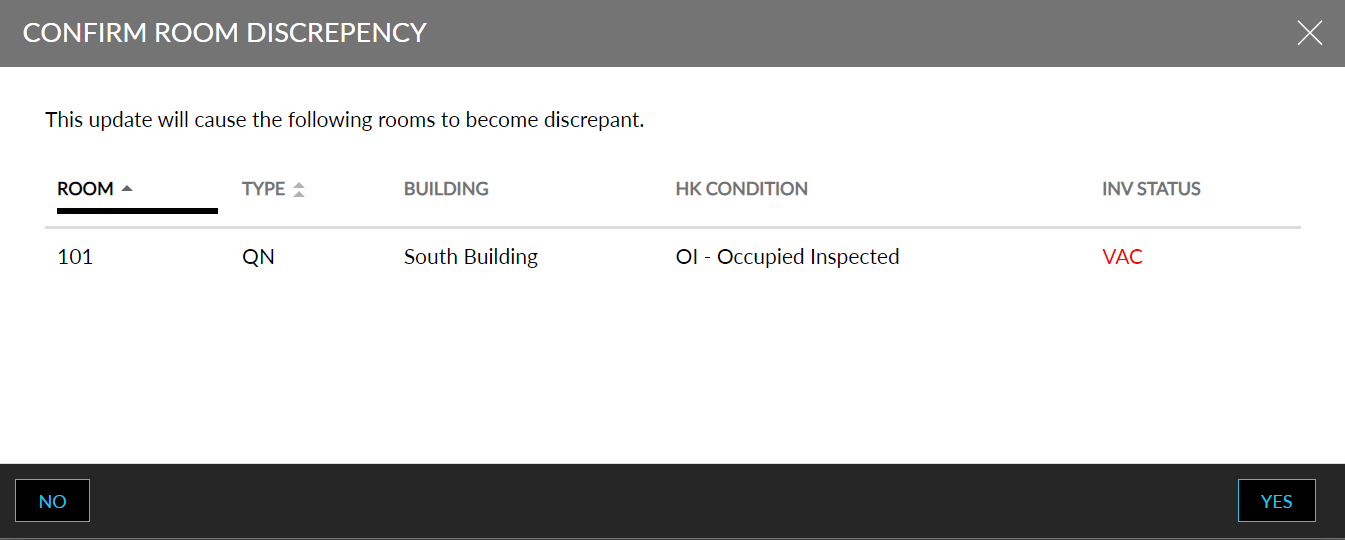
A popup screen, Confirm Room Discrepancy, will be displayed, where guests can confirm the change in housekeeping condition
Roles
The Roles option allows users to define the types of housekeeping roles that are employed by the property. By default, the Guest Room Attendant, Inspector, and House Person roles are already set up. The user can select to use those roles and create additional roles. For example, some properties use Public Area Attendants, Butlers, Lead Housekeepers, and more.
Perform the following steps to create a new role:
Navigate to Rooms Mgmt ➜ Housekeeping ➜ Setup ➜ Roles.
Navigate to the Roles tab or scroll down the page.
Click Add New. The New Role dialog box appears.
Enter the name for the role in the Name field.
Enter a relevant code for the role in the Code field.
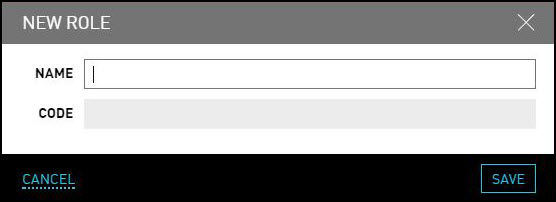
Click Save. The new role is created successfully.
Capacity
The Capacity option allows users to manage housekeeping capacity to balance workloads. User can either choose time or points to assign workloads to the housekeeping staff and set a maximum workload limit for the day.
Perform the following steps to create a new capacity:
Navigate to Rooms Mgmt ➜ Housekeeping ➜ Setup ➜ Capacity.
Navigate to the Capacity tab or scroll to the bottom of the page.
Choose the Default Unit as preferred:
-
Points - Points are based on the size of a room or severity of the cleaning job. Typically, 1 point represents 30 minutes of time. This is the default.
-
Time - This is the maximum amount of time that a housekeeper will work in a shift. Typically, 8:00 is used to represent 8 hours of work.
Enter the Default Max Points or Default Max Time, depending on how the user choose to manage capacity for the property.

Click Save. The default workload capacity is defined to the housekeeping staffs.
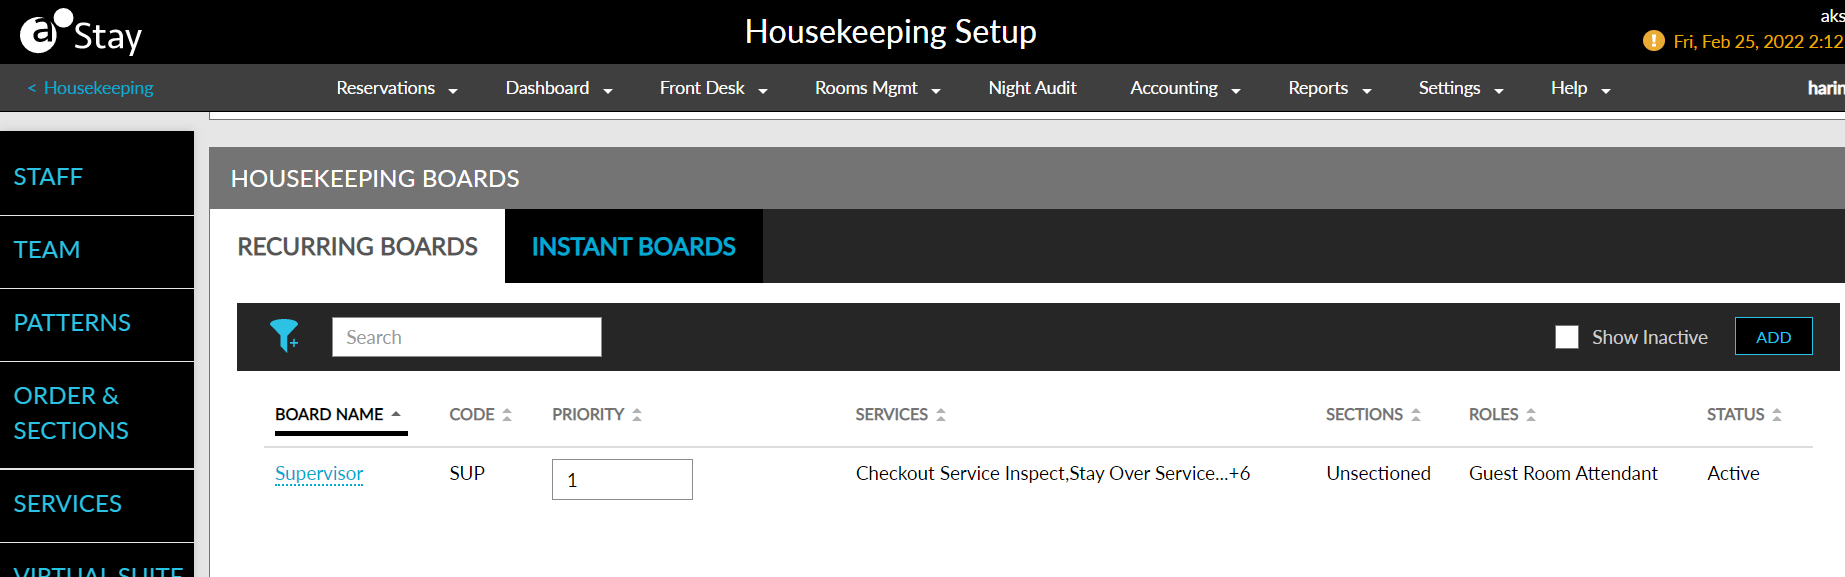
Housekeeping Boards
This section displays the following tabs:
-
Recurring Boards: This tab displays a list of all the recurring boards created in the property.
-
Instant Boards: This tab displays the checkbox, Allow Creation of Instant Boards. When the Allow Creation of Instant Boards checkbox is enabled, users can create instant boards in the Unassigned Service Requests section in the Assign tab of the Housekeeping screen.
Configurations
This section displays the following tabs:
-
Groups
-
Queue Rooms Settings
The Groups tab consists of the Show Group Code for Service Requests checkbox. When selected, the group code is displayed for the service requests created for group reservations.
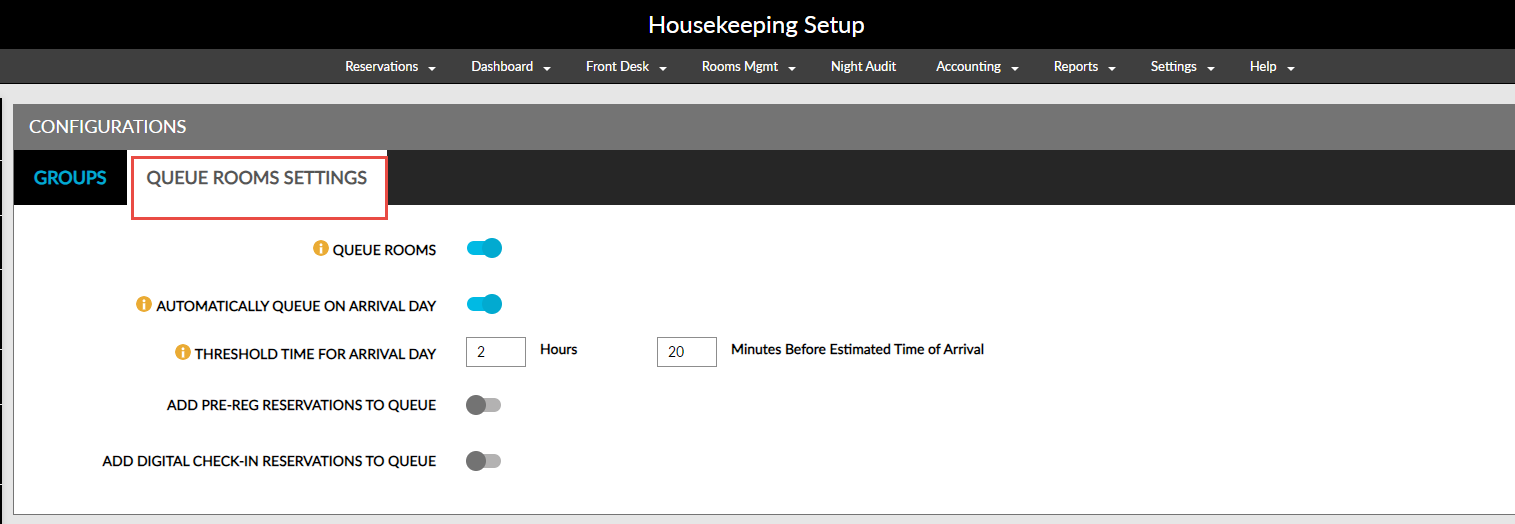
The Queue Rooms Settings tab consists of the following fields:
|
Settings |
Description |
|---|---|
|
Queue Rooms |
When this flag is enabled, the rooms will be queued based on the room assignment and housekeeping conditions. |
|
Automatically Queue on Arrival Day |
|
|
Threshold Time for Arrival Day |
|
|
Add Pre-Reg Reservations to Queue |
|
|
Add Digital Check-In Reservations to Queue |
|